It’s just a matter of time until you accidentally close an Office application without saving its content. Or your computer or app crashes unexpectedly while working on that important project due at the end of the day.
However, when the unexpected happens, no everything is lost. Whether you’re using a Microsoft Office 365 subscription, or standalone version of Office 2019, Office 2016, or earlier, there’s a good chance to recover your work as the apps offer a few ways to recover unsaved documents.
In this Windows 10 guide, we’ll walk you through the steps to recover unsaved Office documents and the things you can do to avoid getting into this situation.
- How to recover unsaved document in Office
- How to avoid unsaved document recovery in Office
We’ll be focusing this guide on Microsoft Word 2019, but the instructions work pretty much identical with older versions, including for other apps, such as Excel and PowerPoint.
How to recover unsaved document in Office
If you close an Office application without saving its content, or your device or app crashed unexpectedly, then you can recover the unsaved document in more than one way.
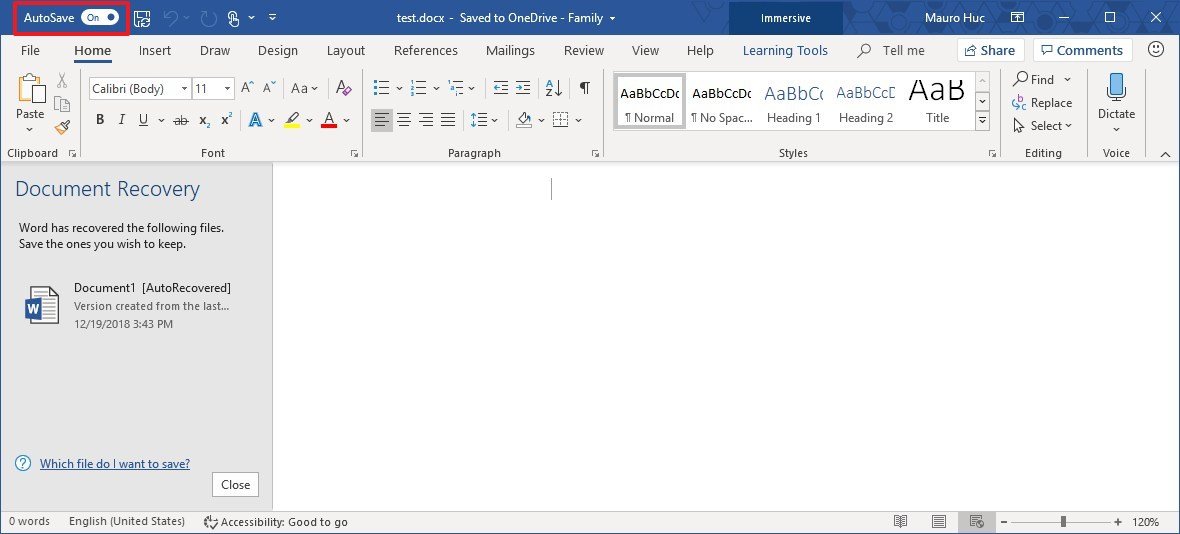
Using Document Recovery pane
To recover a document that wasn’t saved correctly, use these steps:
- Open the Office app that you created the document. For example, Word.
- Create a new blank document.
- Under the Document Recovery section, in the left pane, click the down-arrow button for the document to recover, and select the Save as option.
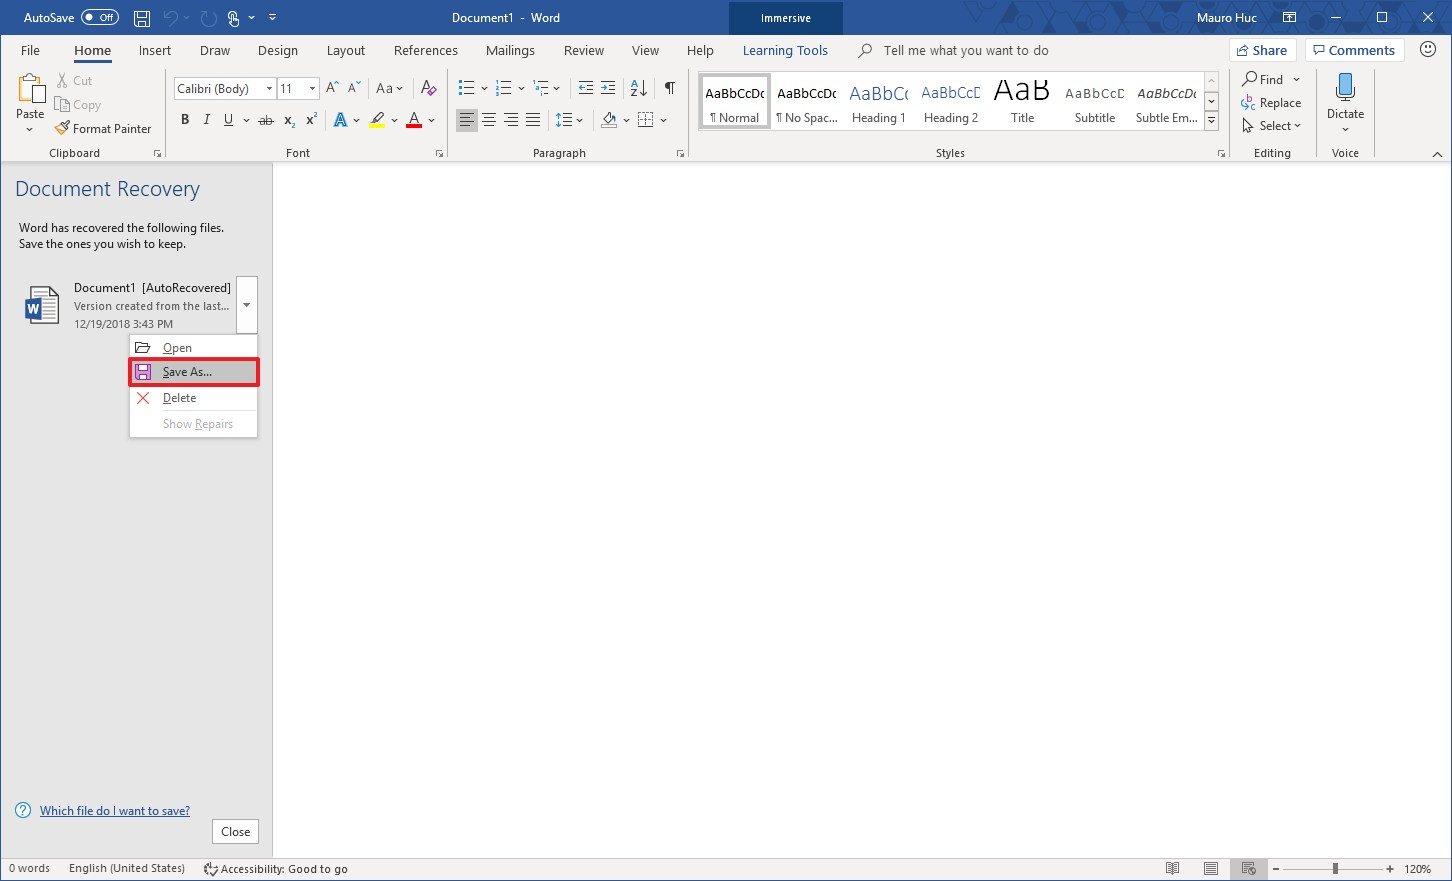
- Select the folder to recover the unsaved document.
- Click the Save button.
Once you’ve completed the steps, you can open the recovered document from the folder you selected.
Using Recover Unsaved Documents option
If you don’t see the “Document Recovery” pane, then use these steps:
- Open the Office app that you created the document. For example, Word.
- Create a new blank document.
- Click the File menu.
- Click on Info.
- Click the Manage Document option.
- Click the Recover Unsaved Documents option.
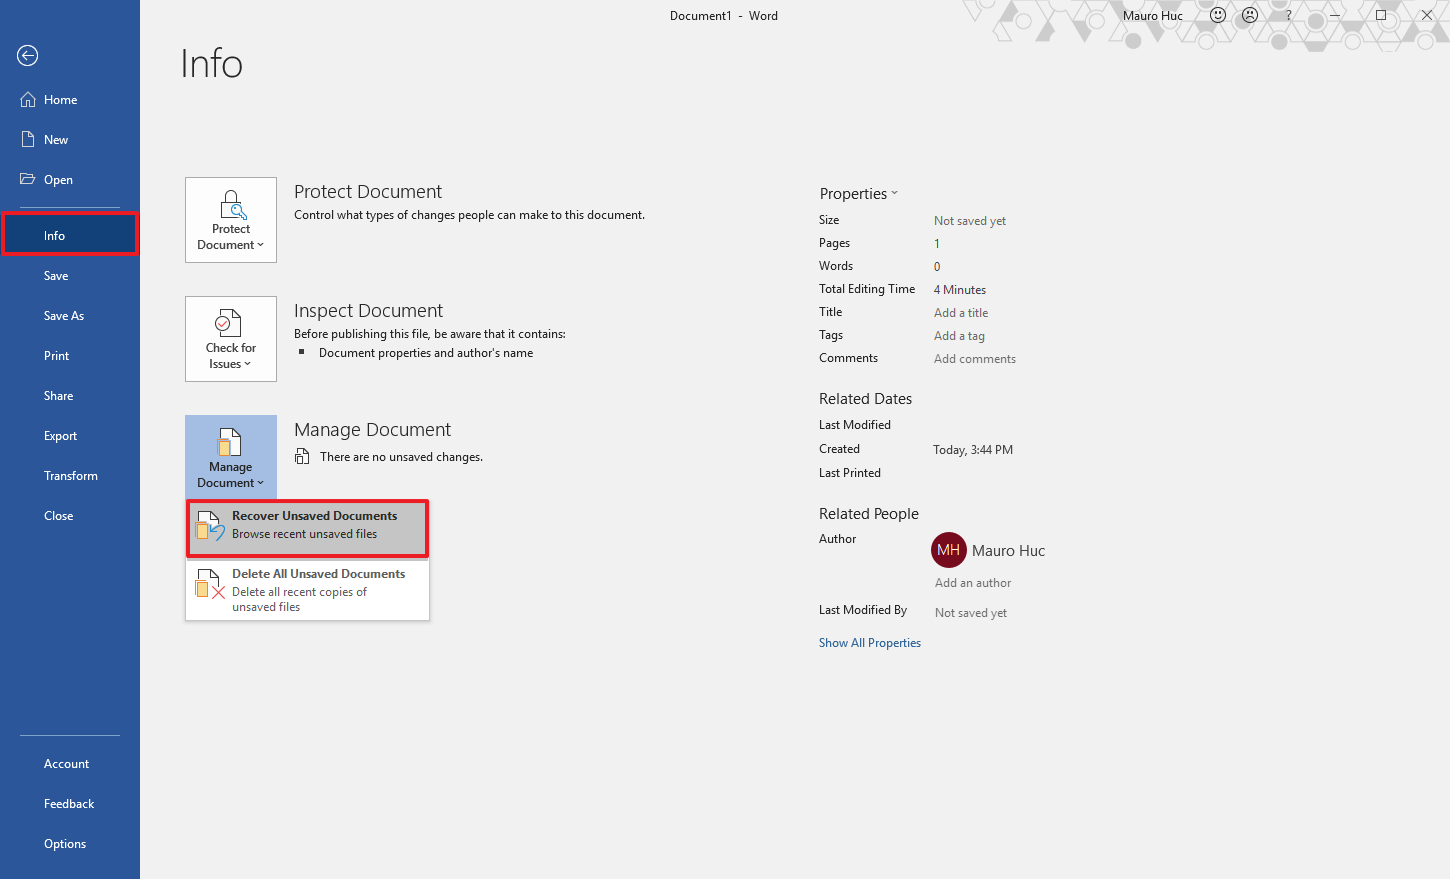
- Select the unsaved document to recover.
- Click the Open button.
You can also access unsaved documents using these steps:
- Open the Office app that you created the document. For example, Word.
- Create a new blank document.
- Click the File menu.
- Click on Open.
- Click the Recover Unsaved Documents button.
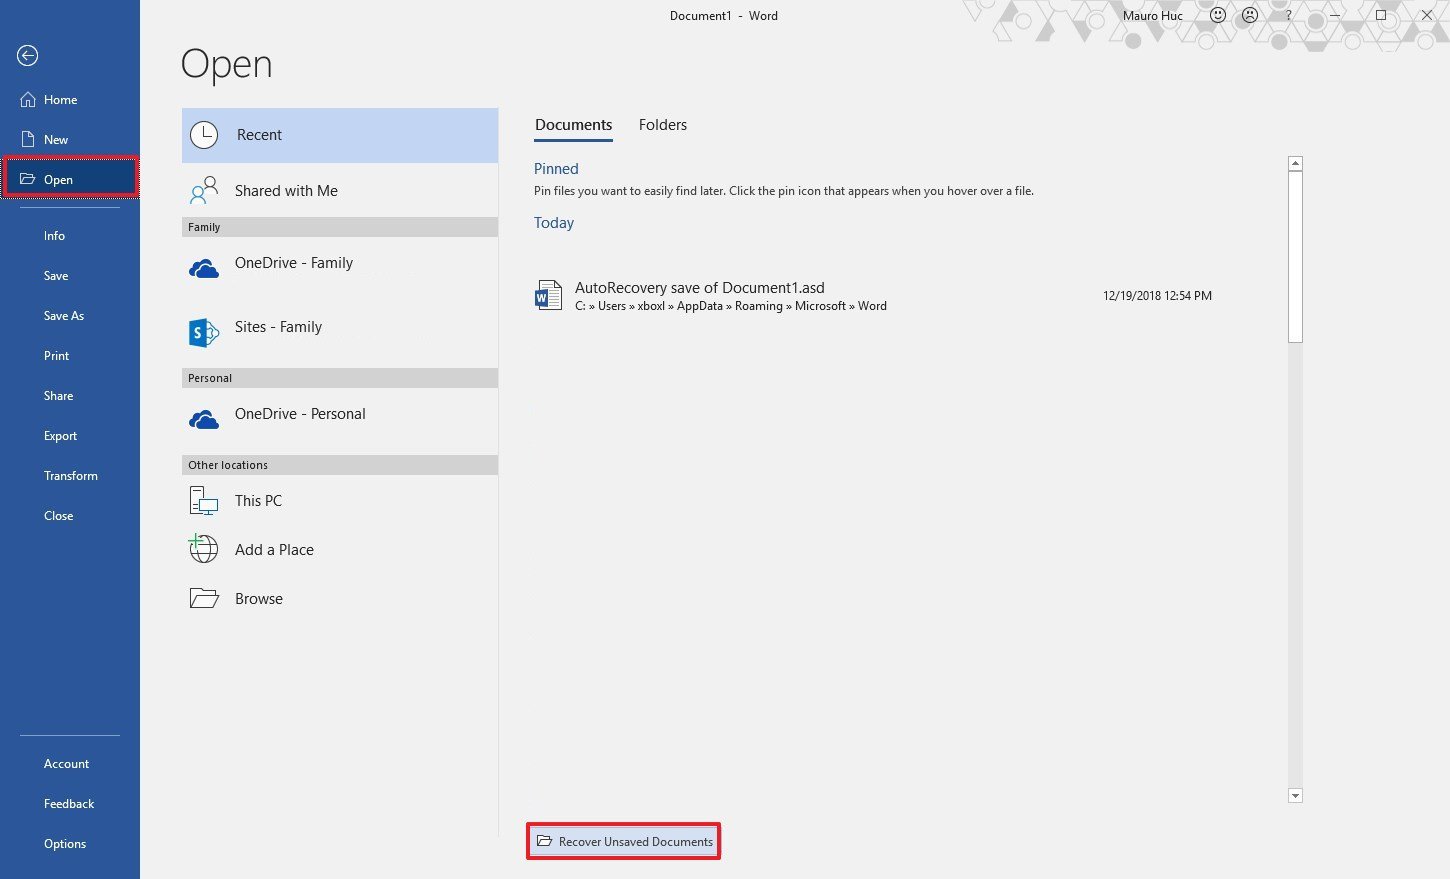
- Select the document.
- Click the Open button.
Once you’ve completed the steps, make sure to save the recovered document before continue adding new content.
Using the AutoRecover file location
If the UnsavedFiles folder is empty, then you can use these steps to recover unsaved documents.
- Open the Office app that you created the document. For example, Word.
- Create a new blank document.
- Click the File menu.
- Click on Options.
- Click on Save.
- Under the “Save documents” section, select the AutoRecover file location path, right-click the selection, and select the Copy option.
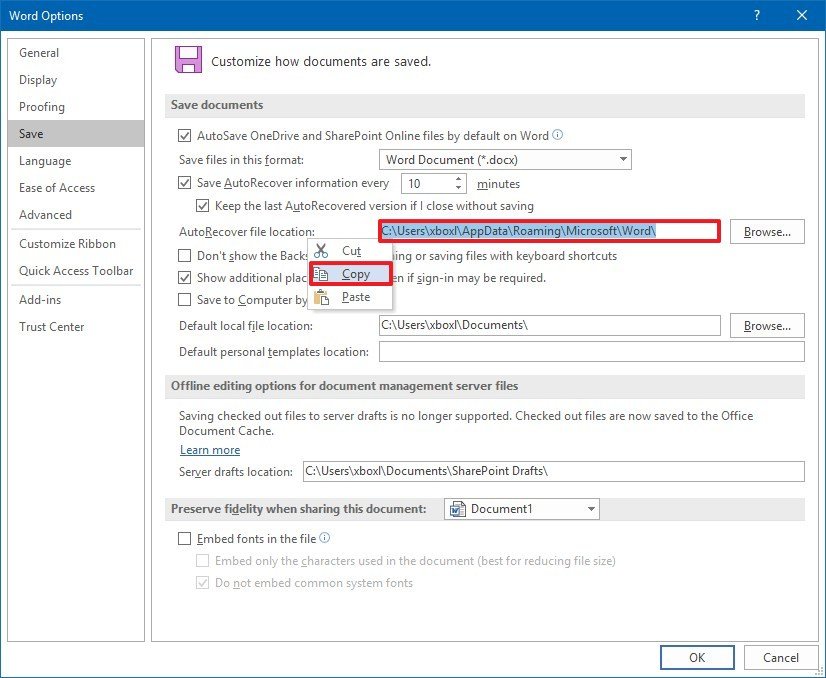
- Open File Explorer (Windows key + E).
- Right-click and paste the path in the File Explorer address bar and press Enter.
- Right-click the .asd file of the document that you want to recover, and select the Open with option.
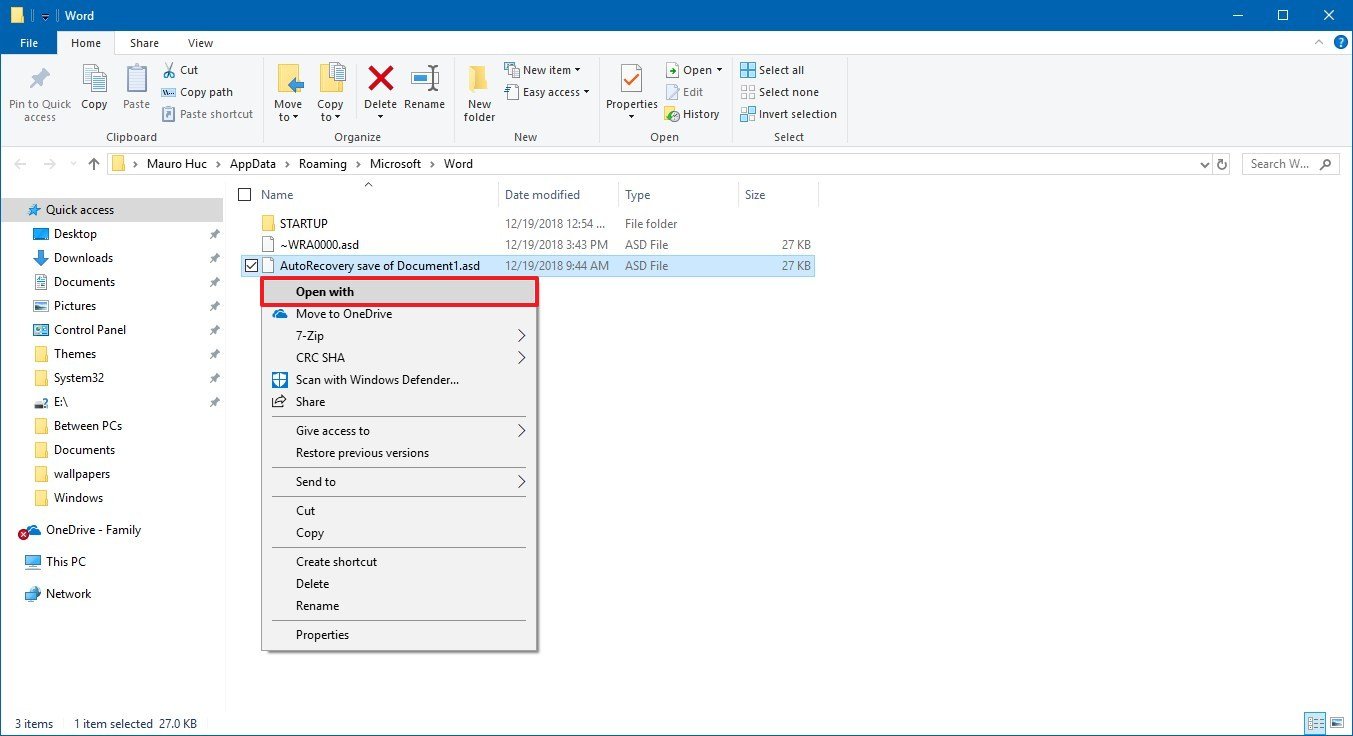
- Select the appropriate app to open the files.
- Click the OK button.
In this folder, you will only find the documents for the app that you’re using. If you’re looking to recover a document created with another Office application, then follow these steps with the correct application.
How to avoid unsaved document recovery in Office
Although Office includes a mechanism to recover documents that you didn’t save, the feature doesn’t always work as we would like, as such we’ll outline below several tips to avoid having to use the recovery options.
Create a new document before opening Office
When you open an Office app, you always start with the startup experience, which allows you to create a new blank document or a document using a template. Instead of using the startup experience, make a habit of creating the file manually before opening the app.
- Open File Explorer.
- Navigate to the folder where you usually save your documents.
- Right-click on a space, select New, and click the document that you want to create (such as Word, Excel, PowerPoint).
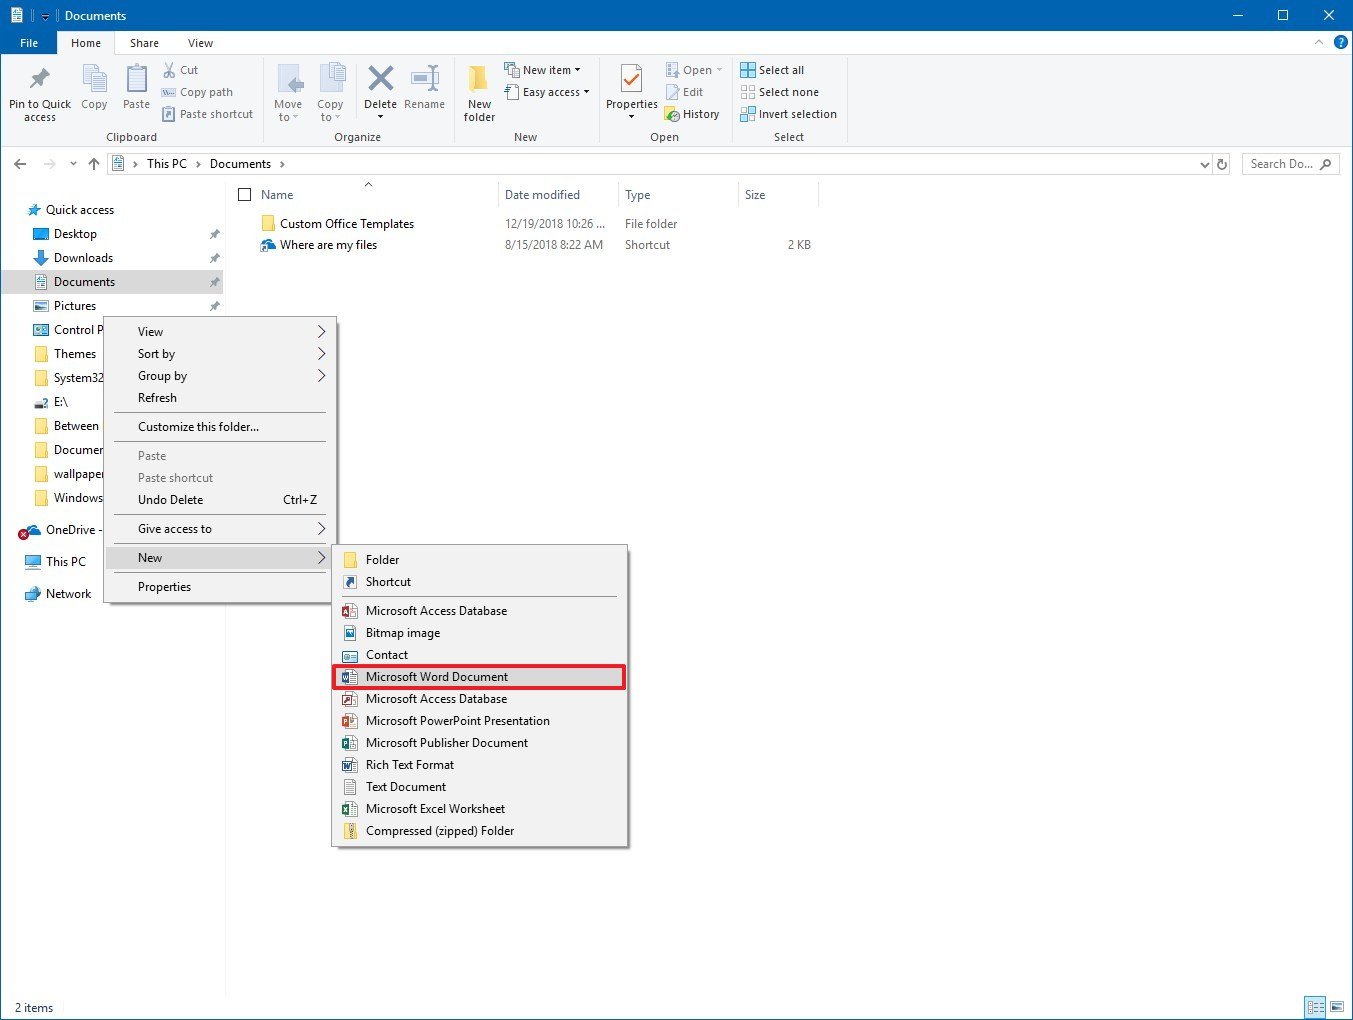
- Type a name of the document and press Enter.
After completing the steps, double-click the file, and you’ll start with an already saved document, which means that you’ll reduce the chances of losing the file and hours of work as the changes will now save automatically.
Enable document recovery
Although auto recovery should be enabled by default, you can avoid losing hours of hard work making sure that the AutoRecover feature is enabled on all the Office applications using these steps:
- Open an Office app. For example, Word.
- Click on File.
- Click on Options.
- Click on Save.
- Under the “Save documents” section, make sure that these options are checked:

- AutoSave OneDrive and SharePoint Online files by default on Word.
- Save AutoRecover information every X minutes.
- Keep the last AutoRecovered version if I close without saving.
- Confirm that AutoRecover file location has a valid path (no empty).
After completing the steps, you want to repeat the instructions in Excel and other apps you may use.
Adjust the autosave settings
Office apps usually save changes every ten minutes automatically, but you can adjust the autosave settings to reduce the amount of work you can lose as a result of the ten minutes gap.
- Open an Office app. For example, Word.
- Click the File menu.
- Click on Options.
- Click on Save.
- Under the “Save documents” section, change the Save AutoRecover information every 10 minutes option to 1 minute.
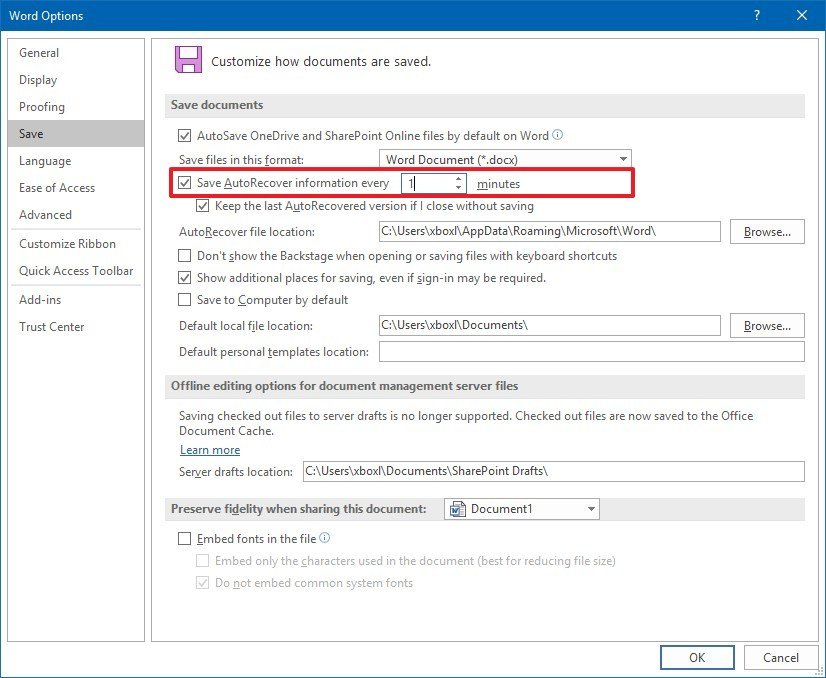
- Click the OK button.
Once you’ve completed the steps, changes you make to the document will save automatically every 60 seconds, which will minimize the amount of work that you may lose if the app crashes or something goes wrong with the file.
Turn on real-time AutoSave
If you’re an Office 365 subscriber, you can turn on AutoSave, which saves new content in real-time.
- Open an Office app. For example, Word.
- Click the File menu.
- Click on Save.
- Select a name for the file.
- Click the Save button.
- Turn on the AutoSave toggle switch in the top-left corner.
After completing the steps, changes you make to the document will save immediately automatically.
If you use other apps, such as Excel and PowerPoint, make sure to repeat these steps on all the apps you use.