Although on Windows 10, the process to install printers has improved over the years, we’re quickly moving into a digital world that has significantly reduced the need to print content on paper.
If you’re also taking the paperless route, you simply no longer use a particular printer, or you’re troubleshooting problems, you can use the Settings app, Control Panel, Print Management, Command Prompt, or even PowerShell to remove the printing device from your computer.
In this Windows 10 guide, we’ll walk you through five different ways to properly remove a printer from your device.
- How to uninstall a printer using Settings
- How to uninstall a printer using Control Panel
- How to uninstall a printer using Print Management
- How to uninstall a printer using Command Prompt
- How to uninstall a printer using PowerShell
How to uninstall a printer using Settings
If you’re no longer using a particular printer, you can uninstall the device using these steps:
- Open Settings.
- Click on Devices.
- Click on Printers & scanners.
- Select the printer and click the Remove device button.
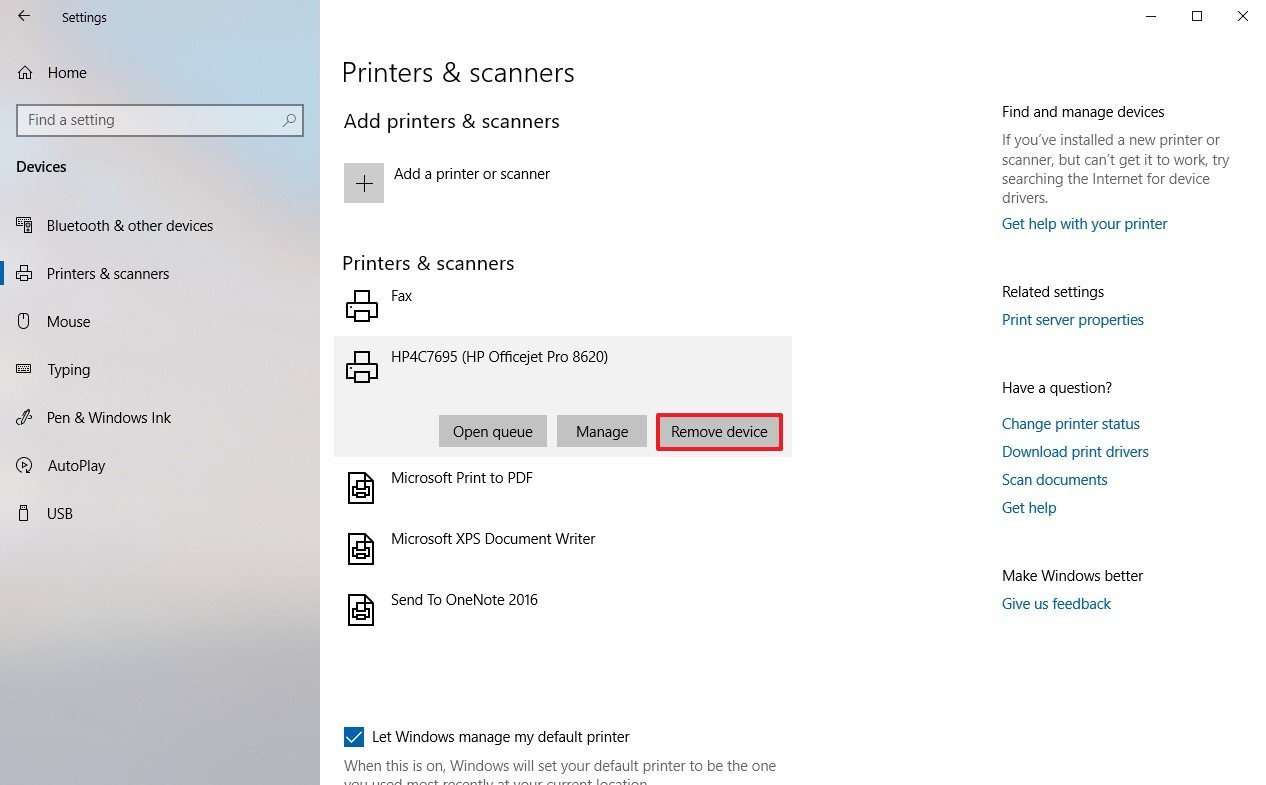
- Click the Yes button to confirm.
Once you’ve completed the steps, the printer will be removed from your device.
Uninstalling printer software
If you’re only using the printer with the basic driver, there’s nothing else to remove. However, if you’re using a third-party utility, or if the Settings app also installed additional tools to manage the printer automatically, you’ll need to remove the remaining software manually.
To remove left behind printer-related applications, use these steps:
- Open Settings.
- Click on Apps.
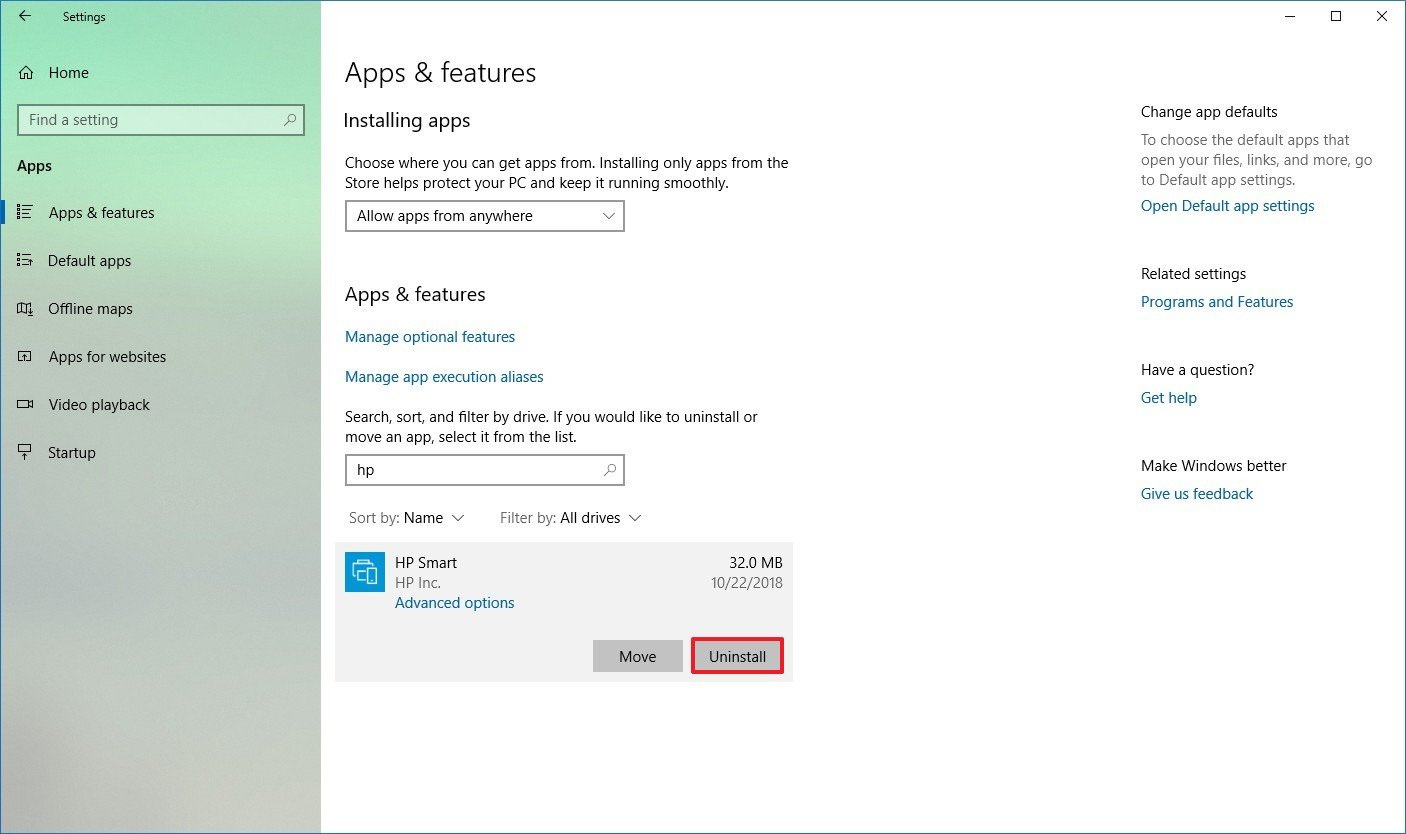
- Click on Apps & features.
- Select the software you want to remove.
- Click the Uninstall button.
- Continue with the on-screen directions to complete the removal.
How to uninstall a printer using Control Panel
Alternatively, you can still uninstall a printing device using Control Panel with these steps:
- Open Control Panel.
- Click on Hardware and Sound.
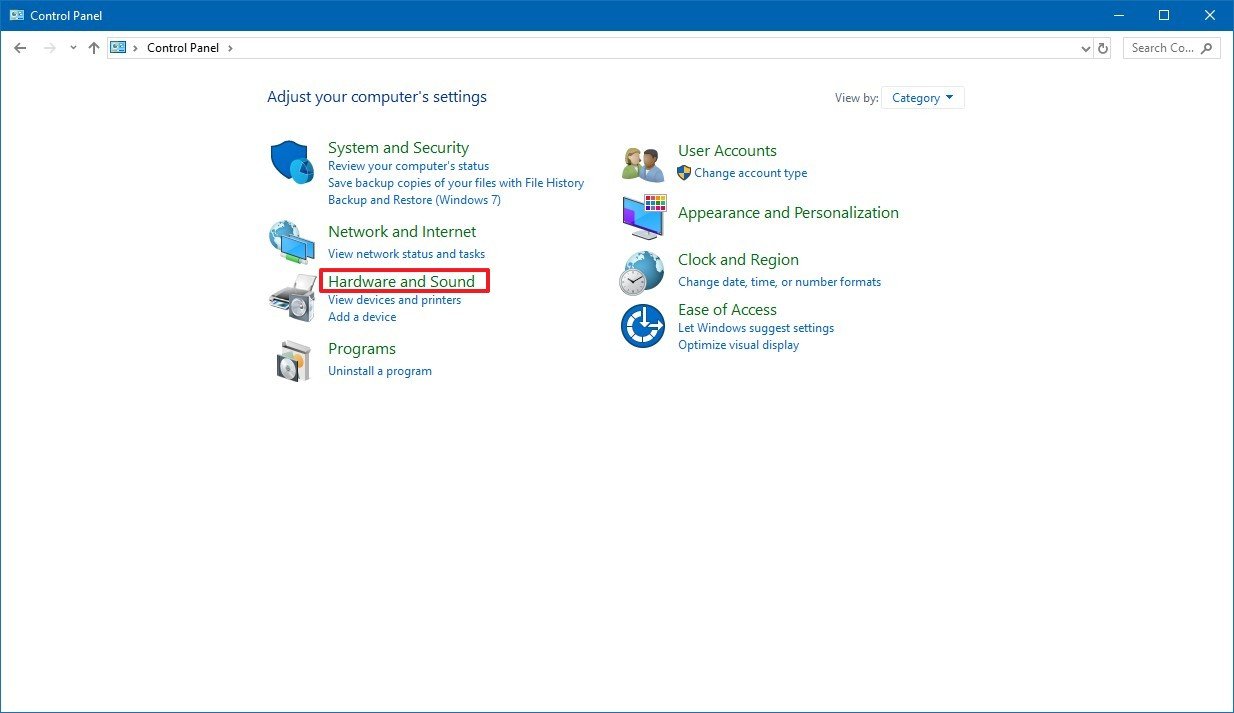
- Click on Devices and Printers.

- Under the “Printers” section, right-click the device you want, and select the Remove device option.
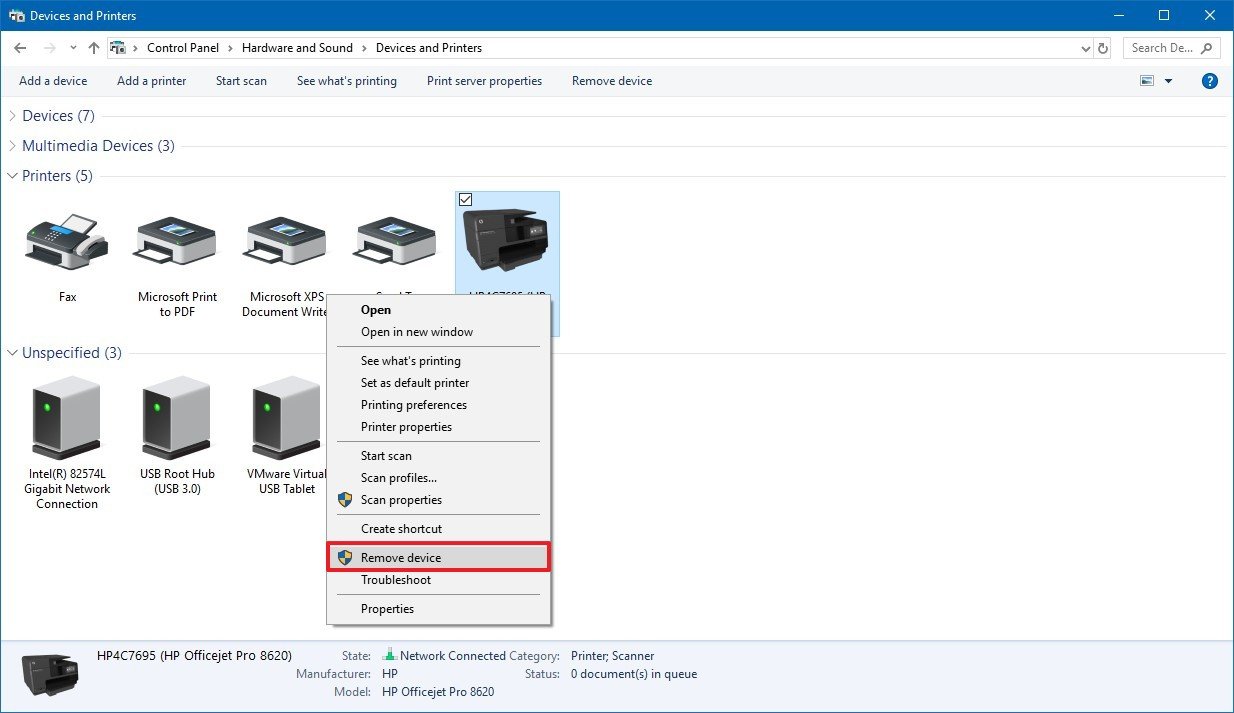
- Click the Yes button to confirm.
Once you’ve completed the steps, the printer in question will no longer be available on your device.
Uninstalling printer software
To remove left behind printer-related applications, use these steps:
- Open Settings.
- Click on Apps.
- Click on Apps & features.
- Select the software you want to remove.
- Click the Uninstall button.
- Continue with the on-screen directions to complete the removal.
How to uninstall a printer using Print Management
On Windows 10, you can also use the Print Management console to remove a printer you no longer use with these steps:
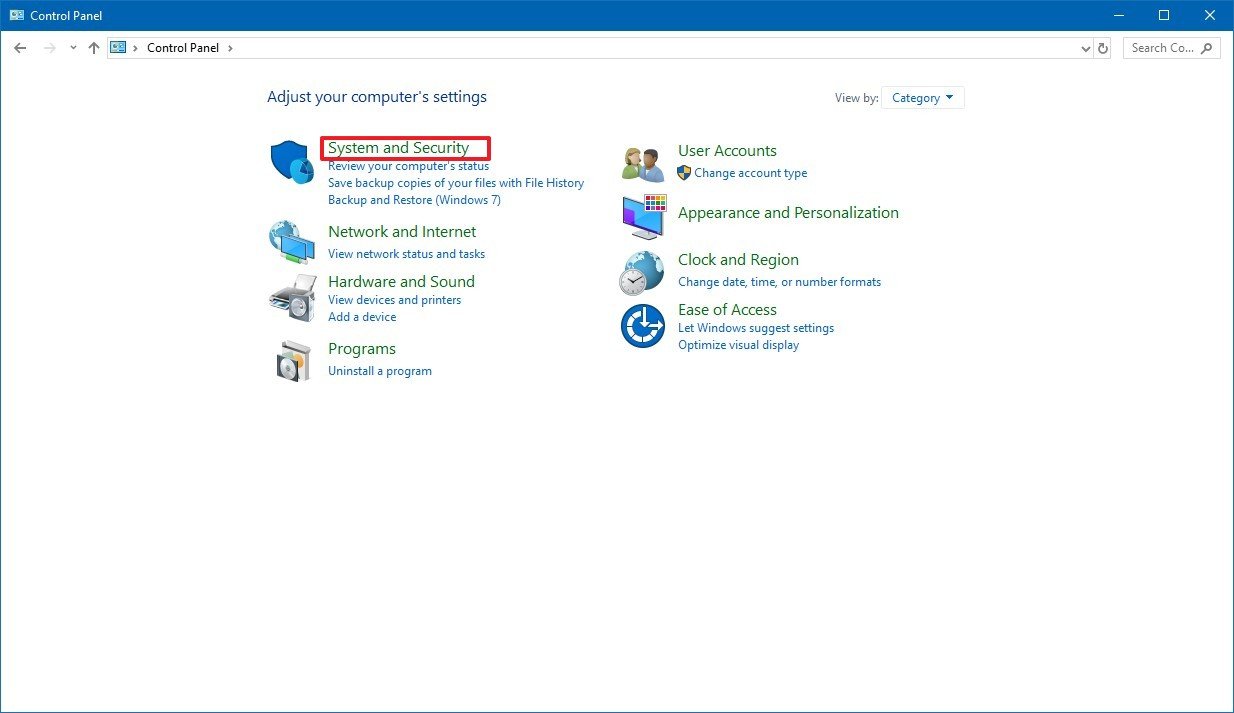
- Open Control Panel.
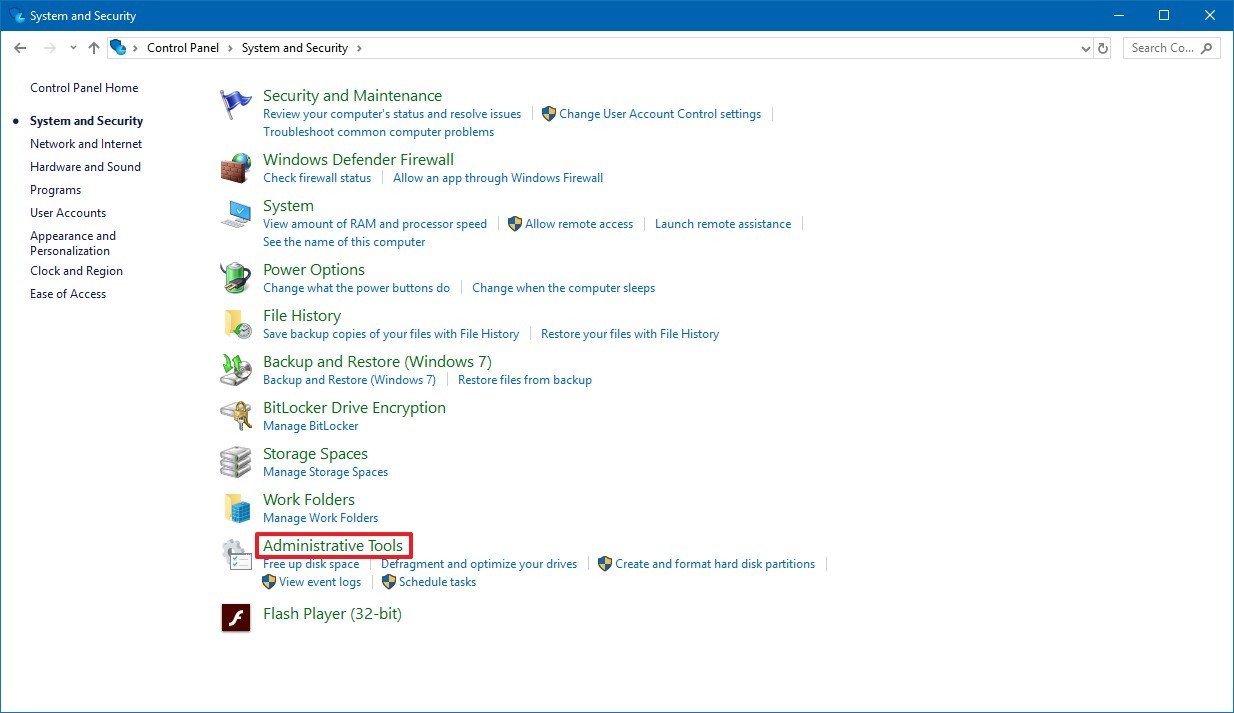
- Click on System and Security.
- Click on Administrative Tools.
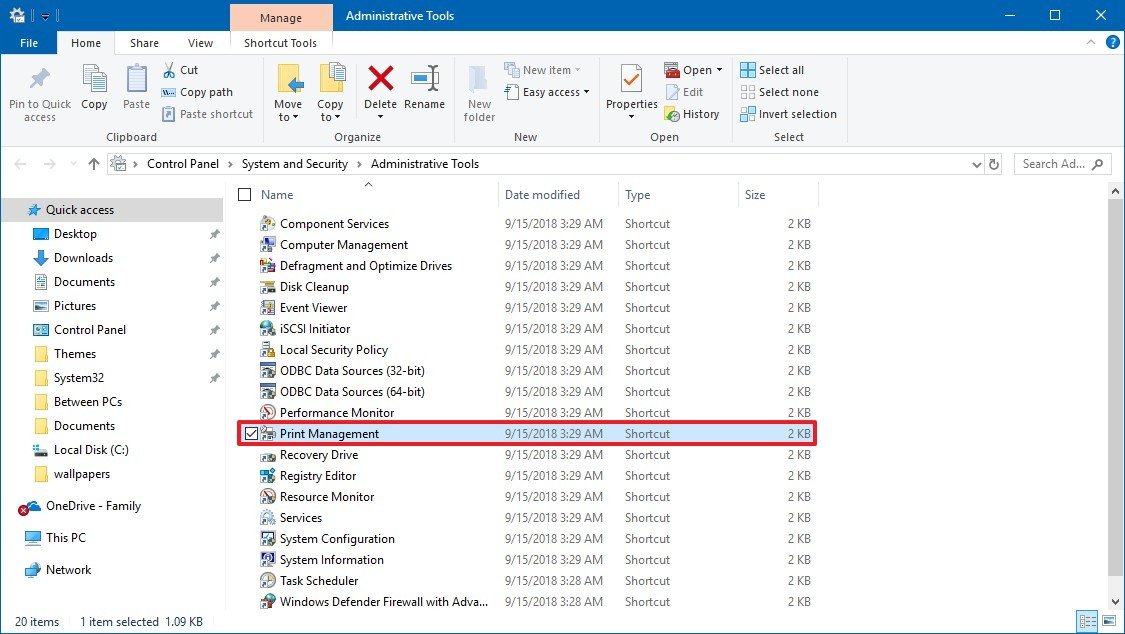
- Double-click the Print Management shortcut.
- Under “Custom Filters,” click on All Printers.
- Right-click the printer that you want to remove, and select the Delete option.
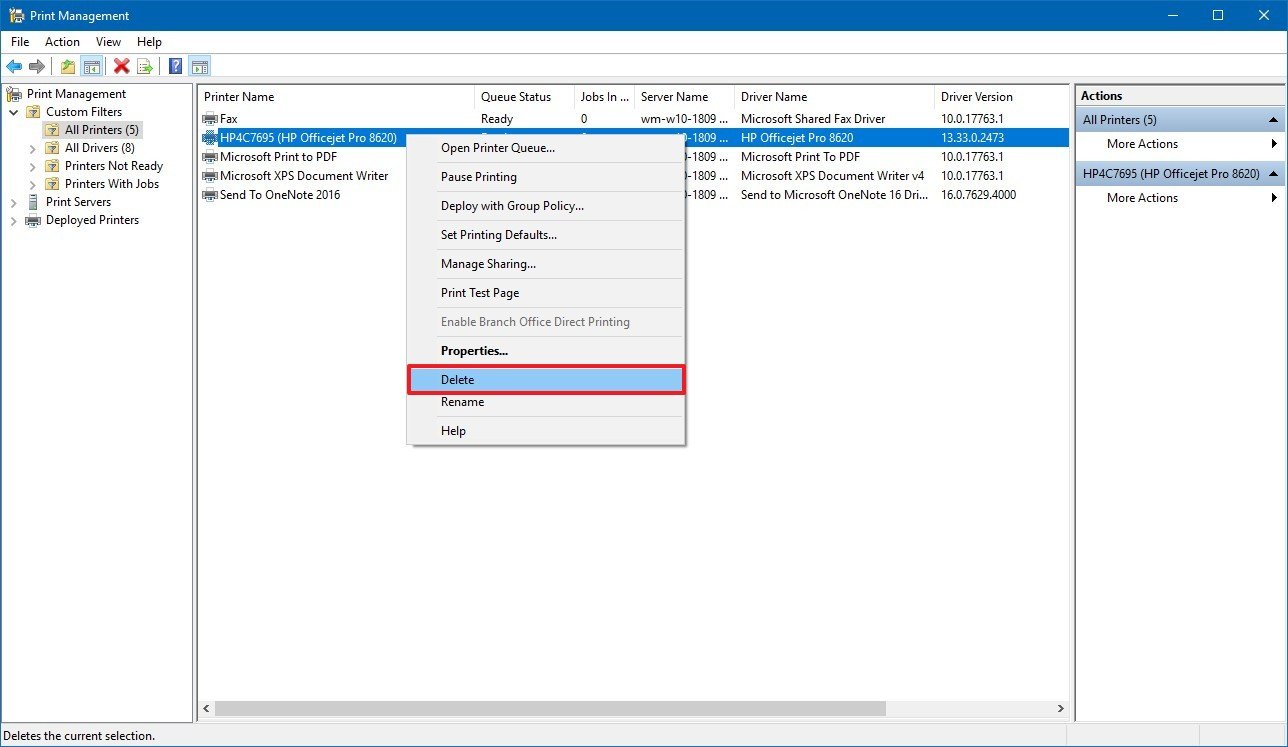
- Click the Yes button.
After completing the steps, the printer that you removed will no longer be available to any user.
Uninstalling printer software
To remove left behind printer-related applications, use these steps:
- Open Settings.
- Click on Apps.
- Click on Apps & features.
- Select the software you want to remove.
- Click the Uninstall button.
- Continue with the on-screen directions to complete the removal.
How to uninstall a printer using Command Prompt
If you prefer using command lines, you can use Command Prompt to delete a printer from Windows 10 using these steps:
- Open Start.
- Search for Command Prompt, right-click the top result, and select the Run as administrator option.
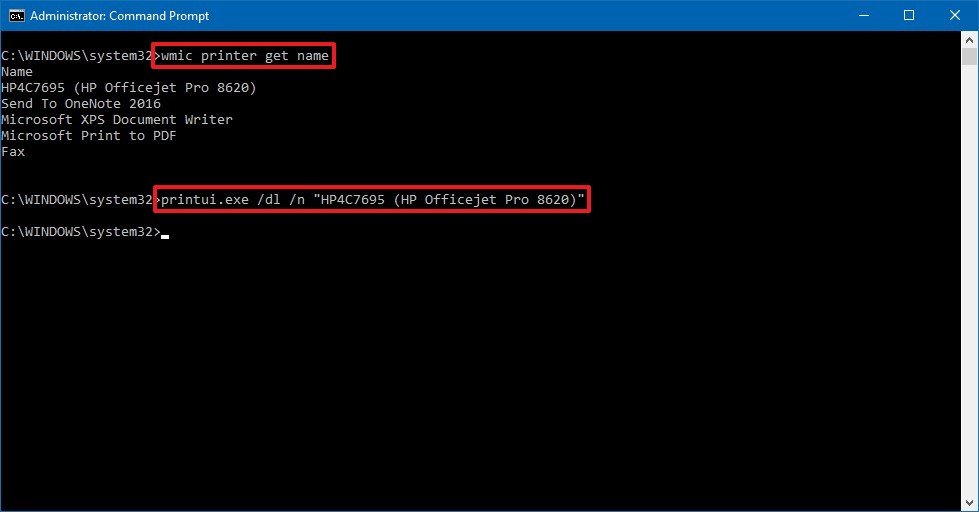
- Type the following command to queue a list of printers on your device and press Enter:
wmic printer get name - Type the following command to uninstall the printer and press Enter:
printui.exe /dl /n "YOUR-PRINTER-NAME"In the command, replace the YOUR-PRINTER-NAME with the full name of your printer see step No. 3.
Once you’ve completed the steps, the printer that you specified in the command will be uninstalled.
Uninstalling printer software
To remove left behind printer-related applications, use these steps:
- Open Settings.
- Click on Apps.
- Click on Apps & features.
- Select the software you want to remove.
- Click the Uninstall button.
- Continue with the on-screen directions to complete the removal.
How to uninstall a printer using PowerShell
If you prefer to use PowerShell, you can use these steps to remove a printer from Windows 10:
- Open Start.
- Search for Windows PowerShell, right-click the top result, and select the Run as administrator option.
- Type the following command to queue a list of printers on your device and press Enter:
Get-Printer | Format-List Name - Type the following command to uninstall the printer and press Enter:
Remove-Printer -Name "YOUR-PRINTER-NAME"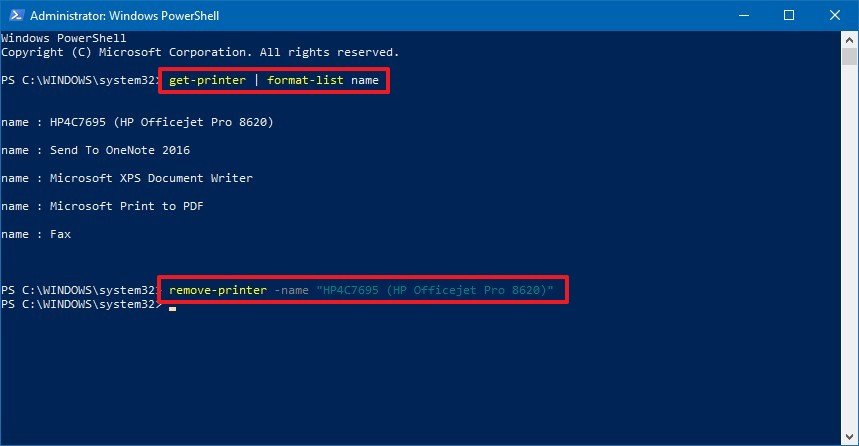
In the command, replace the YOUR-PRINTER-NAME with the full name of your printer see step No. 3.
After completing the steps, the printer that you selected will be removed from your computer.
Uninstalling printer software
To remove left behind printer-related applications, use these steps:
- Open Settings.
- Click on Apps.
- Click on Apps & features.
- Select the software that you want to remove.
- Click the Uninstall button.
- Continue with the on-screen directions to complete the removal.


 → Low price,