- Lenovo 45N1120 4250mAh/48Wh 11.1V laptop battery is made from the highest quality cells and parts. The Lenovo 45N1120 is designed to meet or exceed original equipment specifications. Shopping with us is safe and secure! 100% Guarantee Quality and Fully Test! 45N1120 laptop battery pack for Lenovo ThinkPad T431s Series

New Lenovo 45N1120 notebook battery High Quality Battery 4250mAh/48Wh, 11.1V
Replacement Battery>> Lenovo 45N1120 4250mAh/48Wh 11.1V
Replace the following part numbers:
- Lenovo 45N1120
- Lenovo 45N1122
- Lenovo 45N1121
- Lenovo 45N1123
- Fits the Following Models:
Lenovo ThinkPad T431s SeriesRU: Lenovo 45N1120
DE: AKKU Für Lenovo 45N1120, Ersatz für Lenovo ThinkPad T431s Series.
100% safe and cheap 45N1120 laptop battery deals. Lenovo 45N1120 Battery Power your system. It is the best choose to get standby Lenovo 45N1120 battery for your Lenovo ThinkPad T431s Series here,high quality li-ion cells, longer battery life, competitive price, 1 year warranty, 30 days money back and high quality of service.
www.uk-online.co.uk is your one-stop shop for batteries /Adapters.
Batteries are one of tech’s most boring subjects… until your phone, tablet or laptop stops turning on or turns off too often. Here are our top battery tips and tricks to get the best battery life you can. Also see: How to charge your phone or tablet’s battery faster.
While most of us live in fear of a fading phone battery when we’re out and about, we don’t worry too much about that battery’s eventual lifespan (probably between three and five years). But there are ways to keep your battery in tip-top shape for a long and fruitful life.
Batteries do not enjoy eternal life. Most smartphone manufacturers say their devices rate their batteries at 300-500 cycles. Apple claims that its laptop batteries reach 80 percent of their original capacity after 1,000 charges.
After this point batteries aren’t able to hold as much electricity and will power your device for increasingly shorter periods of time.
So here’s some tips to extend your battery’s lifespan, be that in an iPhone, Android phone, Windows phone, tablet, or laptop. The big questions about how to re-charge a battery is whether you should let it run to zero before re-charging to 100 percent. One reason why people are unsure is something they’ve heard of called the battery “memory effect”.
Lenovo ADS-25SGP-06 laptop battery for Lenovo ideapad 100S-11IBY 80R2003UUSPhilips A00390 laptop battery for Philips A00390/RQ310/311/330 S301 S512
LG ADS-40FSG-19 laptop battery for LG E1948S E2242C E2249 E1948
LG 40W laptop battery for LG E2251S E2251T LCAP21C Monitor
LG LCAP21B laptop battery for LG EAY62549304 LCAP21A 23EA63V 24EA53T Monitor
LG LCAP21C laptop battery for LG 27UD68-W 27inch Monitor – VG White
LG LB62119E laptop battery for LG R500 S510-X
LG DA-50F25 laptop battery for LG NB3740 S34A1-D Sound Bar
Clevo W110BAT-6 laptop battery for Clevo SAGER NP6110 W110ER
ThundeRobot SQU-1406 laptop battery for ThundeRobot 911-E1 911-T2A 911-S2B 911-T1
Author: admin
Toshiba PABAS213 Battery For Toshiba Qosmio T750 T751 T851 F60 F750 F755 V65 4400mAh/48wh 10.8V(Compatible with 11.1V)
- Toshiba PABAS213 4400mAh/48wh 10.8V(Compatible with 11.1V) laptop battery is made from the highest quality cells and parts. The Toshiba PABAS213 is designed to meet or exceed original equipment specifications. Shopping with us is safe and secure! 100% Guarantee Quality and Fully Test! PABAS213 laptop battery pack for Toshiba Qosmio T750 T751 T851 F60 F750 F755 V65

New Toshiba PABAS213 notebook battery High Quality Battery 4400mAh/48wh, 10.8V(Compatible with 11.1V)
Replacement Battery>> Toshiba PABAS213 4400mAh/48wh 10.8V(Compatible with 11.1V)
Replace the following part numbers:
- Toshiba PABAS213
- Toshiba PA3757U-1BRS
- Fits the Following Models:
Battery Number: 6 Cells
Weight:308.5g
Dynabook Qosmio T750/T8BD Dynabook Qosmio T851 Qosmio F60-033 Qosmio F60-10U Qosmio F60-10X Qosmio F60-12W Qosmio F750-1001X Qosmio F750-10Q Qosmio F755-3D320 Dynabook Qosmio T750/T8A Dynabook Qosmio T750/T8B Dynabook Qosmio T750/T8BJ Dynabook Qosmio T750/T8BS Dynabook Qosmio T751/T8CR Dynabook Qosmio T751/T8CW Dynabook Qosmio T851/D8CR Dynabook Qosmio V65 Dynabook Qosmio V65/87M Dynabook Qosmio V65/88L F755-3D290 Qosmio F60-00M Qosmio F60-00Y Qosmio F60-05E Qosmio F60-10H Qosmio F60-10K Qosmio F60-10L Qosmio F60-10V Qosmio F60-10W Qosmio F60-11L Qosmio F60-121 Qosmio F60-136 Qosmio F60-15N Qosmio F60-S530 Qosmio F750 Qosmio F750/02Y Qosmio F750-1002 Qosmio F750-1002X Qosmio F750-1004Xt Qosmio F750-1006X Qosmio F750-10M Qosmio F750-10N Qosmio F750-117 Qosmio F750-11M Qosmio F750-11V Qosmio F755-3D350 Qosmio F755-S5219 Dynabook Qosmio T750/WTVA Dynabook Qosmio V65/86L Qosmio F60 Qosmio F60-10J Qosmio F60-BD531 Qosmio F750-1003X Qosmio F750-10L Qosmio F750-11U Qosmio F755 Qosmio Dynabook Qosmio T750RU: Toshiba PABAS213
DE: AKKU Für Toshiba PABAS213, Ersatz für Toshiba Qosmio T750 T751 T851 F60 F750 F755 V65.
100% safe and cheap PABAS213 laptop battery deals. Toshiba PABAS213 Battery Power your system. It is the best choose to get standby Toshiba PABAS213 battery for your Toshiba Qosmio T750 T751 T851 F60 F750 F755 V65 here,high quality li-ion cells, longer battery life, competitive price, 1 year warranty, 30 days money back and high quality of service.
www.uk-online.co.uk is your one-stop shop for batteries /Adapters.
Batteries are one of tech’s most boring subjects… until your phone, tablet or laptop stops turning on or turns off too often. Here are our top battery tips and tricks to get the best battery life you can. Also see: How to charge your phone or tablet’s battery faster.
While most of us live in fear of a fading phone battery when we’re out and about, we don’t worry too much about that battery’s eventual lifespan (probably between three and five years). But there are ways to keep your battery in tip-top shape for a long and fruitful life.
Batteries do not enjoy eternal life. Most smartphone manufacturers say their devices rate their batteries at 300-500 cycles. Apple claims that its laptop batteries reach 80 percent of their original capacity after 1,000 charges.
After this point batteries aren’t able to hold as much electricity and will power your device for increasingly shorter periods of time.
So here’s some tips to extend your battery’s lifespan, be that in an iPhone, Android phone, Windows phone, tablet, or laptop. The big questions about how to re-charge a battery is whether you should let it run to zero before re-charging to 100 percent. One reason why people are unsure is something they’ve heard of called the battery “memory effect”.
Lenovo 45N1120 laptop battery for Lenovo ThinkPad T431s SeriesLenovo ADS-25SGP-06 laptop battery for Lenovo ideapad 100S-11IBY 80R2003UUS
Philips A00390 laptop battery for Philips A00390/RQ310/311/330 S301 S512
LG ADS-40FSG-19 laptop battery for LG E1948S E2242C E2249 E1948
LG 40W laptop battery for LG E2251S E2251T LCAP21C Monitor
LG LCAP21B laptop battery for LG EAY62549304 LCAP21A 23EA63V 24EA53T Monitor
LG LCAP21C laptop battery for LG 27UD68-W 27inch Monitor – VG White
LG LB62119E laptop battery for LG R500 S510-X
LG DA-50F25 laptop battery for LG NB3740 S34A1-D Sound Bar
Clevo W110BAT-6 laptop battery for Clevo SAGER NP6110 W110ER
Cheap MSI BTY-M6H Battery Replace for MSI GE62 GE72 GP62 PE60 PE70
- MSI BTY-M6H 3834mAh / 41.40Wh 10.8V laptop battery is made from the highest quality cells and parts. The MSI BTY-M6H is designed to meet or exceed original equipment specifications. Shopping with us is safe and secure! 100% Guarantee Quality and Fully Test! BTY-M6H laptop battery pack for MSI GE62 GE72 GP62 PE60 PE70

New MSI BTY-M6H notebook battery High Quality Battery 3834mAh / 41.40Wh, 10.8V
Replacement Battery>> MSI BTY-M6H 3834mAh / 41.40Wh 10.8V
Replace the following part numbers:
- MSI BTY-M6H
- Fits the Following Models:
MSI GE62, GE72, GP62 2QE, MS-1792, PE60, PE60 6QE, PE70RU: MSI BTY-M6H
DE: AKKU Für MSI BTY-M6H, Ersatz für MSI GE62 GE72 GP62 PE60 PE70.
100% safe and cheap BTY-M6H laptop battery deals. MSI BTY-M6H Battery Power your system. It is the best choose to get standby MSI BTY-M6H battery for your MSI GE62 GE72 GP62 PE60 PE70 here,high quality li-ion cells, longer battery life, competitive price, 1 year warranty, 30 days money back and high quality of service.
www.uk-online.co.uk is your one-stop shop for batteries /Adapters.
Batteries are one of tech’s most boring subjects… until your phone, tablet or laptop stops turning on or turns off too often. Here are our top battery tips and tricks to get the best battery life you can. Also see: How to charge your phone or tablet’s battery faster.
While most of us live in fear of a fading phone battery when we’re out and about, we don’t worry too much about that battery’s eventual lifespan (probably between three and five years). But there are ways to keep your battery in tip-top shape for a long and fruitful life.
Batteries do not enjoy eternal life. Most smartphone manufacturers say their devices rate their batteries at 300-500 cycles. Apple claims that its laptop batteries reach 80 percent of their original capacity after 1,000 charges.
After this point batteries aren’t able to hold as much electricity and will power your device for increasingly shorter periods of time.
So here’s some tips to extend your battery’s lifespan, be that in an iPhone, Android phone, Windows phone, tablet, or laptop. The big questions about how to re-charge a battery is whether you should let it run to zero before re-charging to 100 percent. One reason why people are unsure is something they’ve heard of called the battery “memory effect”.
Toshiba PABAS213 laptop battery for Toshiba Qosmio T750 T751 T851 F60 F750 F755 V65Lenovo 45N1120 laptop battery for Lenovo ThinkPad T431s Series
Lenovo ADS-25SGP-06 laptop battery for Lenovo ideapad 100S-11IBY 80R2003UUS
Philips A00390 laptop battery for Philips A00390/RQ310/311/330 S301 S512
LG ADS-40FSG-19 laptop battery for LG E1948S E2242C E2249 E1948
LG 40W laptop battery for LG E2251S E2251T LCAP21C Monitor
LG LCAP21B laptop battery for LG EAY62549304 LCAP21A 23EA63V 24EA53T Monitor
LG LCAP21C laptop battery for LG 27UD68-W 27inch Monitor – VG White
LG LB62119E laptop battery for LG R500 S510-X
LG DA-50F25 laptop battery for LG NB3740 S34A1-D Sound Bar
IBM laptop battery pack for IBM 81Y2432 371-4676
- IBM DS5020 1.1Ah/1100mAh(7.26Wh/7040mWh) 6.6V laptop battery is made from the highest quality cells and parts. The IBM DS5020 is designed to meet or exceed original equipment specifications. Shopping with us is safe and secure! 100% Guarantee Quality and Fully Test! DS5020 laptop battery pack for IBM 81Y2432 371-4676

New IBM DS5020 notebook battery High Quality Battery 1.1Ah/1100mAh(7.26Wh/7040mWh), 6.6V
Replacement Battery>> IBM DS5020 1.1Ah/1100mAh(7.26Wh/7040mWh) 6.6V
Replace the following part numbers:
- IBM BAT
- IBM 2S1P-1
- IBM A123
- IBM APR18650M1
- IBM P36539-08-A
- IBM 59Y5260
- IBM DS5020
- Fits the Following Models:
IBM 81Y2432 371-4676RU: IBM DS5020
DE: AKKU Für IBM DS5020, Ersatz für IBM 81Y2432 371-4676.
100% safe and cheap DS5020 laptop battery deals. IBM DS5020 Battery Power your system. It is the best choose to get standby IBM DS5020 battery for your IBM 81Y2432 371-4676 here,high quality li-ion cells, longer battery life, competitive price, 1 year warranty, 30 days money back and high quality of service.
www.uk-online.co.uk is your one-stop shop for batteries /Adapters.
Batteries are one of tech’s most boring subjects… until your phone, tablet or laptop stops turning on or turns off too often. Here are our top battery tips and tricks to get the best battery life you can. Also see: How to charge your phone or tablet’s battery faster.
While most of us live in fear of a fading phone battery when we’re out and about, we don’t worry too much about that battery’s eventual lifespan (probably between three and five years). But there are ways to keep your battery in tip-top shape for a long and fruitful life.
Batteries do not enjoy eternal life. Most smartphone manufacturers say their devices rate their batteries at 300-500 cycles. Apple claims that its laptop batteries reach 80 percent of their original capacity after 1,000 charges.
After this point batteries aren’t able to hold as much electricity and will power your device for increasingly shorter periods of time.
So here’s some tips to extend your battery’s lifespan, be that in an iPhone, Android phone, Windows phone, tablet, or laptop. The big questions about how to re-charge a battery is whether you should let it run to zero before re-charging to 100 percent. One reason why people are unsure is something they’ve heard of called the battery “memory effect”.
MSI BTY-M6H laptop battery for MSI GE62 GE72 GP62 PE60 PE70Toshiba PABAS213 laptop battery for Toshiba Qosmio T750 T751 T851 F60 F750 F755 V65
Lenovo 45N1120 laptop battery for Lenovo ThinkPad T431s Series
Lenovo ADS-25SGP-06 laptop battery for Lenovo ideapad 100S-11IBY 80R2003UUS
Philips A00390 laptop battery for Philips A00390/RQ310/311/330 S301 S512
LG ADS-40FSG-19 laptop battery for LG E1948S E2242C E2249 E1948
LG 40W laptop battery for LG E2251S E2251T LCAP21C Monitor
LG LCAP21B laptop battery for LG EAY62549304 LCAP21A 23EA63V 24EA53T Monitor
LG LCAP21C laptop battery for LG 27UD68-W 27inch Monitor – VG White
LG LB62119E laptop battery for LG R500 S510-X
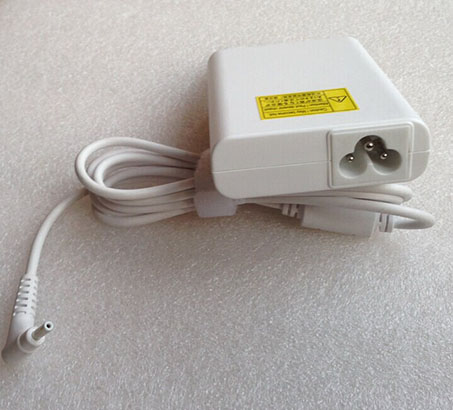
ACER PA-1650-80 Charger Cord Adapter
Buy ACER PA-1650-80 Power Adapters at our online store(UK) with the best after-sales service. Deals for high quality ACER PA-1650-80
New Replacement ACER PA-1650-80 AC Adapter

Product Details
Device Type: Power adapter – external
Power Capacity: 19V 3.42A,65W
Manufacturer Warranty: 1 year warranty
Fit Models: Notebook Adapter for Acer Aspire S7-191 Series Ultrabook
Adapter Part Numbers:
INPUT: 100-240V 50-60Hz (for worldwide use)
OUTPUT: 19V 3.42A, 65W
Connecter size: 3.0mm×1.1 mm (ref to the picture).
Outlet: 3-prong
Cord Cable: US/ UK/ EU/ AU plug
One Power cord is included with this adapter for Free
SKU:GSB-AFB
KP.06503.007,KP.06503.006,PA-1650-80,NP.ADT11.00F,NPADT1100F,TP.SW7AD.65W- AS-A05
UK online suppliers of high quality laptop batteries, laptop AC adapters. All of our batteries are built using high quality cells from Japan and Korea. We carry replacement laptop batteries for over 50000 laptop models.
DE:ACER PA-1650-80 NOTEBOOK-Netzteil. Das richtige ACER Laptop adapter finden.
NL:ACER PA-1650-80 power adapter
Warranty
This Power Charger will work like a charm with your ACER PA-1650-80 laptop. A free power cord is also attached for your convenience. We do proudly declare that this ACER PA-1650-80 AC adapter is high quality. Besides, our ACER PA-1650-80 AC adapter is brand new and backed by a 30-day money guarantee. Please purchase with full confidence. So if your original adapter is lost or broken, this would be your choice. 1 Year Warranty & Fast Shipping.
ACER PA-1650-80 adapter charger
How to select laptop adapter?
Make sure the volt and currect of adapter is same as your origial.
Carefully check the size of tip of adapter is correct.
Check and confirm with the photo of power adapter is that you are looking for.
Why buy laptop adapter from uk-online.co.uk?
We will be your one-stop shop for ACER PA-1650-80 AC Adapters. We make every effort to provide Replacement ACER PA-1650-80 Laptop AC Adapters and Power Supply Units for Notebook Computers. If you have lost or misplaced your ACER PA-1650-80 Laptop Charger, then look no further for a replacement.
At our store, we have an enormous selection of ACER PA-1650-80 Laptop AC/DC Adapters. You can be sure to find the ACER PA-1650-80 AC Adapter Kit you need at low cost, Quick response and support.
All of the ACER PA-1650-80 laptop chargers you will find at our store are brand new and guaranteed to meet or exceed original ACER PA-1650-80 AC Adapter specifications.
Power supplies are a frequently misunderstood-and overlooked-PC component. Also called a power supply unit or PSU, the component that supplies power to a computer.
We ship to the Laptop adapter around Globe USA, Canada, UK, NZ and Ireland, Australia. View more laptop adapter. Contact with us if any problem on selecting power adapter.
asus G750JH-DB71 Adapter
Buy asus G750JH-DB71 Power Adapters at our online store(UK) with the best after-sales service. Deals for high quality asus G750JH-DB71
New Replacement ASUS G750JH-DB71 ADP-230EB_T AC Adapter

Product Details
Device Type: Power adapter – external
Power Capacity: 19.5V 11.8A,230W
Manufacturer Warranty: 1 year warranty
Fit Models: Notebook Adapter for Delta 230W Cord Charger ASUS G750JH-DB71
Adapter Part Numbers:
NW230-01,ADP-230EB T,0A001-00390000
UK online suppliers of high quality laptop batteries, laptop AC adapters. All of our batteries are built using high quality cells from Japan and Korea. We carry replacement laptop batteries for over 50000 laptop models.
DE:asus G750JH-DB71 NOTEBOOK-Netzteil. Das richtige ASUS Laptop adapter finden.
NL:asus G750JH-DB71 power adapter
Warranty
This Power Charger will work like a charm with your asus G750JH-DB71 laptop. A free power cord is also attached for your convenience. We do proudly declare that this asus G750JH-DB71 AC adapter is high quality. Besides, our asus G750JH-DB71 AC adapter is brand new and backed by a 30-day money guarantee. Please purchase with full confidence. So if your original adapter is lost or broken, this would be your choice. 1 Year Warranty & Fast Shipping.
asus G750JH-DB71 adapter charger
How to select laptop adapter?
Make sure the volt and currect of adapter is same as your origial.
Carefully check the size of tip of adapter is correct.
Check and confirm with the photo of power adapter is that you are looking for.
Why buy laptop adapter from uk-online.co.uk?
We will be your one-stop shop for asus G750JH-DB71 AC Adapters. We make every effort to provide Replacement asus G750JH-DB71 Laptop AC Adapters and Power Supply Units for Notebook Computers. If you have lost or misplaced your asus G750JH-DB71 Laptop Charger, then look no further for a replacement.
At our store, we have an enormous selection of asus G750JH-DB71 Laptop AC/DC Adapters. You can be sure to find the asus G750JH-DB71 AC Adapter Kit you need at low cost, Quick response and support.
All of the asus G750JH-DB71 laptop chargers you will find at our store are brand new and guaranteed to meet or exceed original asus G750JH-DB71 AC Adapter specifications.
Power supplies are a frequently misunderstood-and overlooked-PC component. Also called a power supply unit or PSU, the component that supplies power to a computer.
We ship to the Laptop adapter around Globe USA, Canada, UK, NZ and Ireland, Australia. View more laptop adapter. Contact with us if any problem on selecting power adapter.
Replacement Notebook Adapter for Microsoft Pro_3 Notebook Adapter
Buy Microsoft Pro_3 Power Adapters at our online store(UK) with the best after-sales service. Deals for high quality Microsoft Pro_3
New Replacement MICROSOFT Pro_3 AC Adapter

Product Details
Device Type: Power adapter – external
Power Capacity: 12V 2.58A 30W
Manufacturer Warranty: 1 year warranty
Fit Models: Notebook Adapter for 12V 2.58A AC Charger Power Supply Adapter For Microsoft Surface Pro 3 Tablet
Adapter Part Numbers:
Connecter size:
DC Cable Length: 1.8m
Compatible with Microsoft Surface Pro 3 Tablet:
Microsoft Surface Pro 3 Tablet
Microsoft Surface Pro 3 Windows 8
UK online suppliers of high quality laptop batteries, laptop AC adapters. All of our batteries are built using high quality cells from Japan and Korea. We carry replacement laptop batteries for over 50000 laptop models.
DE:Microsoft Pro_3 NOTEBOOK-Netzteil. Das richtige MICROSOFT Laptop adapter finden.
NL:Microsoft Pro_3 power adapter
Warranty
This Power Charger will work like a charm with your Microsoft Pro_3 laptop. A free power cord is also attached for your convenience. We do proudly declare that this Microsoft Pro_3 AC adapter is high quality. Besides, our Microsoft Pro_3 AC adapter is brand new and backed by a 30-day money guarantee. Please purchase with full confidence. So if your original adapter is lost or broken, this would be your choice. 1 Year Warranty & Fast Shipping.
Microsoft Pro_3 adapter charger
How to select laptop adapter?
Make sure the volt and currect of adapter is same as your origial.
Carefully check the size of tip of adapter is correct.
Check and confirm with the photo of power adapter is that you are looking for.
Why buy laptop adapter from uk-online.co.uk?
We will be your one-stop shop for Microsoft Pro_3 AC Adapters. We make every effort to provide Replacement Microsoft Pro_3 Laptop AC Adapters and Power Supply Units for Notebook Computers. If you have lost or misplaced your Microsoft Pro_3 Laptop Charger, then look no further for a replacement.
At our store, we have an enormous selection of Microsoft Pro_3 Laptop AC/DC Adapters. You can be sure to find the Microsoft Pro_3 AC Adapter Kit you need at low cost, Quick response and support.
All of the Microsoft Pro_3 laptop chargers you will find at our store are brand new and guaranteed to meet or exceed original Microsoft Pro_3 AC Adapter specifications.
Power supplies are a frequently misunderstood-and overlooked-PC component. Also called a power supply unit or PSU, the component that supplies power to a computer.
We ship to the Laptop adapter around Globe USA, Canada, UK, NZ and Ireland, Australia. View more laptop adapter. Contact with us if any problem on selecting power adapter.
Microsoft Replacement Adapter for Microsoft S89S
Buy Microsoft S89S Power Adapters at our online store(UK) with the best after-sales service. Deals for high quality Microsoft S89S
New Replacement MICROSOFT S89S AC Adapter

Product Details
Device Type: Power adapter – external
Power Capacity: DC 12V 2.58A
Manufacturer Warranty: 1 year warranty
Fit Models: Notebook Adapter for DC 12V 2.58A Car Charger Charging for Microsoft Surface PRO 3 Tablet S89S
Adapter Part Numbers:
Package Content:
1X DC 12V 2.58A Car Charger Charging for Microsoft Surface PRO 3 Tablet
UK online suppliers of high quality laptop batteries, laptop AC adapters. All of our batteries are built using high quality cells from Japan and Korea. We carry replacement laptop batteries for over 50000 laptop models.
DE:Microsoft S89S NOTEBOOK-Netzteil. Das richtige MICROSOFT Laptop adapter finden.
NL:Microsoft S89S power adapter
Warranty
This Power Charger will work like a charm with your Microsoft S89S laptop. A free power cord is also attached for your convenience. We do proudly declare that this Microsoft S89S AC adapter is high quality. Besides, our Microsoft S89S AC adapter is brand new and backed by a 30-day money guarantee. Please purchase with full confidence. So if your original adapter is lost or broken, this would be your choice. 1 Year Warranty & Fast Shipping.
Microsoft S89S adapter charger
How to select laptop adapter?
Make sure the volt and currect of adapter is same as your origial.
Carefully check the size of tip of adapter is correct.
Check and confirm with the photo of power adapter is that you are looking for.
Why buy laptop adapter from uk-online.co.uk?
We will be your one-stop shop for Microsoft S89S AC Adapters. We make every effort to provide Replacement Microsoft S89S Laptop AC Adapters and Power Supply Units for Notebook Computers. If you have lost or misplaced your Microsoft S89S Laptop Charger, then look no further for a replacement.
At our store, we have an enormous selection of Microsoft S89S Laptop AC/DC Adapters. You can be sure to find the Microsoft S89S AC Adapter Kit you need at low cost, Quick response and support.
All of the Microsoft S89S laptop chargers you will find at our store are brand new and guaranteed to meet or exceed original Microsoft S89S AC Adapter specifications.
Power supplies are a frequently misunderstood-and overlooked-PC component. Also called a power supply unit or PSU, the component that supplies power to a computer.
We ship to the Laptop adapter around Globe USA, Canada, UK, NZ and Ireland, Australia. View more laptop adapter. Contact with us if any problem on selecting power adapter.
Adapter dell PA-5M10 Charger Cord
Buy dell PA-5M10 Power Adapters at our online store(UK) with the best after-sales service. Deals for high quality dell PA-5M10
New Replacement DELL PA-5M10 ADP-150RB_B 331-7224 FMGV3 450-15192 AC Adapter

Product Details
Device Type: Power adapter – external
Power Capacity: 19.5V 7.7A 150W
Manufacturer Warranty: 1 year warranty
Fit Models: Notebook Adapter for Dell XPS 17 150W Slim AC Power Adapter Supply Charger
Adapter Part Numbers:
PA-5M10,ADP-150RB B,330-5829,330-5830,ADP-150RB B,DA150PM100-00,J408P,N426P,R940P,331-7224,FMGV3,450-15192
UK online suppliers of high quality laptop batteries, laptop AC adapters. All of our batteries are built using high quality cells from Japan and Korea. We carry replacement laptop batteries for over 50000 laptop models.
JP:dell PA-5M10
DE:dell PA-5M10 NOTEBOOK-Netzteil. Das richtige DELL Laptop adapter finden.
RU:dell PA-5M10
Warranty
This Power Charger will work like a charm with your dell PA-5M10 laptop. A free power cord is also attached for your convenience. We do proudly declare that this dell PA-5M10 AC adapter is high quality. Besides, our dell PA-5M10 AC adapter is brand new and backed by a 30-day money guarantee. Please purchase with full confidence. So if your original adapter is lost or broken, this would be your choice. 1 Year Warranty & Fast Shipping.
dell PA-5M10 adapter charger
How to select laptop adapter?
Make sure the volt and currect of adapter is same as your origial.
Carefully check the size of tip of adapter is correct.
Check and confirm with the photo of power adapter is that you are looking for.
Why buy laptop adapter from uk-online.co.uk?
We will be your one-stop shop for dell PA-5M10 AC Adapters. We make every effort to provide Replacement dell PA-5M10 Laptop AC Adapters and Power Supply Units for Notebook Computers. If you have lost or misplaced your dell PA-5M10 Laptop Charger, then look no further for a replacement.
At our store, we have an enormous selection of dell PA-5M10 Laptop AC/DC Adapters. You can be sure to find the dell PA-5M10 AC Adapter Kit you need at low cost, Quick response and support.
All of the dell PA-5M10 laptop chargers you will find at our store are brand new and guaranteed to meet or exceed original dell PA-5M10 AC Adapter specifications.
Power supplies are a frequently misunderstood-and overlooked-PC component. Also called a power supply unit or PSU, the component that supplies power to a computer.
We ship to the Laptop adapter around Globe USA, Canada, UK, NZ and Ireland, Australia. View more laptop adapter. Contact with us if any problem on selecting power adapter.
ASUS C31N1517 Battery For ASUS TP301 TP301UA TP301UJ 4780mAh/55Wh 11.55V
- ASUS C31N1517 4780mAh/55Wh 11.55V laptop battery is made from the highest quality cells and parts. The ASUS C31N1517 is designed to meet or exceed original equipment specifications. Shopping with us is safe and secure! 100% Guarantee Quality and Fully Test! C31N1517 laptop battery pack for ASUS TP301 TP301UA TP301UJ

New ASUS C31N1517 notebook battery High Quality Battery 4780mAh/55Wh, 11.55V
Replacement Battery>> ASUS C31N1517 4780mAh/55Wh 11.55V
Replace the following part numbers:
- ASUS C31N1517
- ASUS 0B200-01840000
- Fits the Following Models:
ASUS TP301, TP301U, TP301UA, TP301UA6200, TP301UA6500, TP301UJ, VivoBook Flip TP301UA, VivoBook Flip TP301UJRU: ASUS C31N1517
DE: AKKU Für ASUS C31N1517, Ersatz für ASUS TP301 TP301UA TP301UJ.
100% safe and cheap C31N1517 laptop battery deals. ASUS C31N1517 Battery Power your system. It is the best choose to get standby ASUS C31N1517 battery for your ASUS TP301 TP301UA TP301UJ here,high quality li-ion cells, longer battery life, competitive price, 1 year warranty, 30 days money back and high quality of service.
www.uk-online.co.uk is your one-stop shop for batteries /Adapters.
Batteries are one of tech’s most boring subjects… until your phone, tablet or laptop stops turning on or turns off too often. Here are our top battery tips and tricks to get the best battery life you can. Also see: How to charge your phone or tablet’s battery faster.
While most of us live in fear of a fading phone battery when we’re out and about, we don’t worry too much about that battery’s eventual lifespan (probably between three and five years). But there are ways to keep your battery in tip-top shape for a long and fruitful life.
Batteries do not enjoy eternal life. Most smartphone manufacturers say their devices rate their batteries at 300-500 cycles. Apple claims that its laptop batteries reach 80 percent of their original capacity after 1,000 charges.
After this point batteries aren’t able to hold as much electricity and will power your device for increasingly shorter periods of time.
So here’s some tips to extend your battery’s lifespan, be that in an iPhone, Android phone, Windows phone, tablet, or laptop. The big questions about how to re-charge a battery is whether you should let it run to zero before re-charging to 100 percent. One reason why people are unsure is something they’ve heard of called the battery “memory effect”.
ASUS 90XB03UN-MPW020 laptop battery for XiaoMi Lenovo HPASUS UX390UA-DH51-GR laptop battery for 45W ASUS ZenBook 3
ASUS ADP-45XE laptop battery for ASUS ZenBook 3 UX390 UX390U UX390UA
HTC B0P82100 replacement battery for HTC T1H HTC Nexus 9 8.9 Tablet with free tool
Philips HF12 laptop battery for Philips HF3520/3485/3480/3471/3470 Wake-Up Light EXCELLENT
Google W033R004H laptop battery for Google Home
Microsoft 1623 laptop battery for Microsoft Surface 3
Beats B0514 laptop battery for Beats Pill XL Charger
LG EAY64449302 laptop battery for LG DA-180C19 EAY64449302 Power Supply
Clevo M590KBAT-12 laptop battery for Alienware Aurora MALX M59 M590