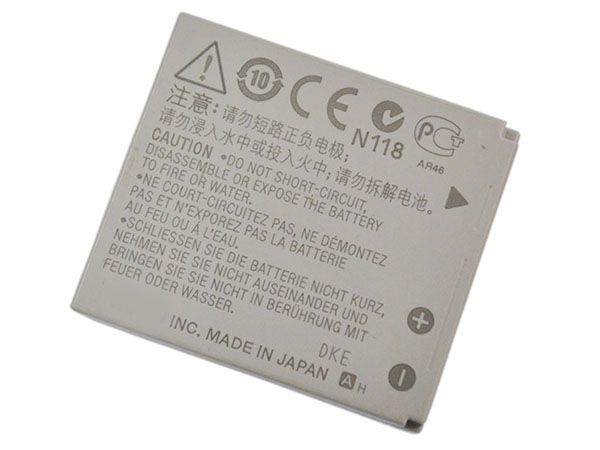
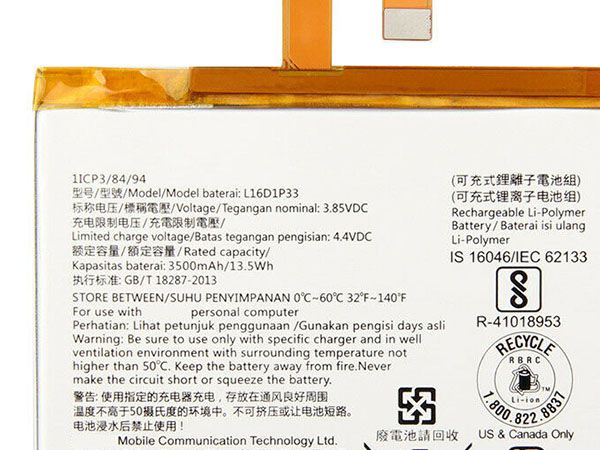
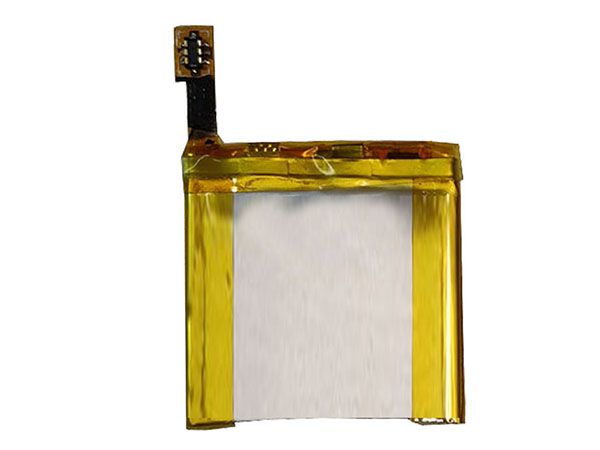
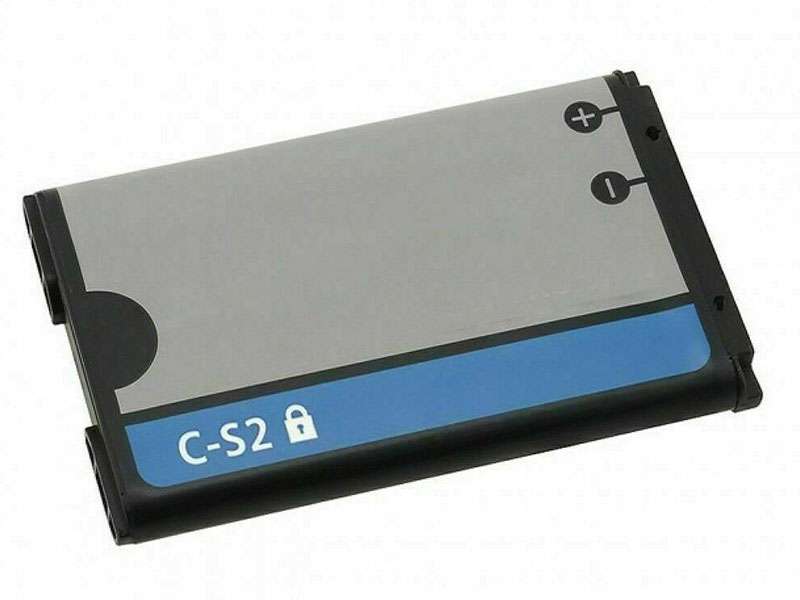
When the Huawei mobile phone is turned on, the interface is stuck

The phone is always on the Honor interface, it may be that the phone has set permissions, accidentally delete some system files, and then can not enter the system. It is recommended that you try to press and hold the power button for 20 seconds to turn it off and then try it again. Still unable to boot, while pressing the phone power button, volume +, volume – three buttons at the same time, enter the recovery mode, clear the data to restore the factory settings. The data in the phone will be deleted when the factory is restored.

The following steps to enter recovery mode are as follows:

1. Use the volume + and volume buttons to adjust the bright bar to “wipe data/factory reset”, ie “clear data recovery factory setting”, press the power button to confirm.

2. Use the Volume + and Volume – buttons to adjust the highlight to “Yes, delete all user data” and press the power button to confirm.

3. Wait for a while until the screen appears. Select “reboot system now” to restart the phone and press the power button to confirm.

If you still can’t open it, please bring your warranty certificate to the nearby Huawei Customer Service Center for inspection and repair.

Samsung i9100 mobile phone stuck, can only do in the lock screen interface

1. Long press the right power button for 8-10 seconds to boot
2. Restart the phone and press the menu button in the lower left corner to enter the phone security mode, and then check if it can be turned on normally. If you can boot, please delete the recently installed third-party software, or restore the phone to factory settings after backing up important data.
3. If the problem persists, it is recommended that you carry the mobile phone three-pack certificate and send the mobile phone to the nearest Samsung service center for testing.

Tablet password forgot how to crack?

Apple IPAD

1. First of all, you have to put your computer in the boot state, but also open iTunes on the computer, connect the iPad to the computer through the data cable.

2. When you connect your tablet and computer, press your home button and power on the keyboard until the ipad screen appears:

3. You will find that a box will pop up on your computer: click the “OK” button

4. If you find that your tablet is not the latest version of the system, iTunes on your computer will remind you if you want to install iso’s latest system: Click “Restore and Update”.

5. Next, on the page you installed, a box will pop up and click “Next” – “Agree”.

6. And you will see that on the screen of your computer, you will see the latest program download waiting for iso, which takes about 1 hour. The screen saver or black screen cannot appear during the computer screen.

7. Finally, after the version on your tablet is updated to the new version, clicking on the recovery ipad system will automatically install it into your ipad.

8. The final step, after waiting for the new version to be downloaded, will display the screen you need to use when you buy it back. Step by step, finally enter the previous Apple ID and Apple password to complete the recovery, and you can re-use our iPad!

Android tablet

1. Different from Apple’s tablet, it should be shut down on the basis of the power not less than 20%. In the off state, press and hold the volume up + down button + power button, the volume up and down button keeps pressing for 10 seconds. Above, this time will enter the recovery mode, as shown in the figure:

2, find the settings on the flat panel, find “restore factory settings” in the settings, and then use the power button to determine, it will automatically double-clear and restore the factory. Figure:

3, after everything is done, reopen your tablet is the time to buy it back, you can enter the tablet.

iPhone battery disassembly process (iPhone6s Plus as an example)

To avoid damage to your phone, please be aware of the following.

1. Please use the screwdriver correctly, otherwise it will cause the screw to slip. Or damage the phone.

2. Be sure to use a magnetic screw that helps you remember where each screw is located. Improper installation of the screw may damage your phone.

3. In the process of replacing the accessories, the mobile phone cable is relatively fragile, please be careful to disassemble.

4. During the disassembly process, remember to put the removed screws in a safe position to avoid the lack of screws during installation.

Disassemble steps:

1. Remove the teardown tool and phone battery.

2. Turn off your phone.

3. Use a pentagonal screwdriver to remove the two pentagonal screws under the phone (located on both sides of the phone’s charging port).

4. After removing the screws, do not rush to open the back cover of the phone. First use the hair dryer to heat the edge of the phone for 1-2 minutes (so that the waterproof glue softens, easy to open the back cover).

5. Remove the suction cup from the tool and place the suction cup above the “back button”.

6. Gently pull a slit and insert the triangle into the gap.

7. Use a triangular piece to gently open the display. Do not use too much force too fast, otherwise the body may be damaged.

Note: If you are concerned about poor control, you can insert several triangles into the gap to fix it while you are opening the display.

8. After you have opened the display, you can open the display and pull the display off, paying attention to the glue.

9. Use the Phillips screwdriver to remove the set screw on the battery clip iron.

10. Then remove the battery clips with tweezers.

11. Use the disassemble crowbar to remove the battery cable opening. The intensity is not too strong and it is easy to remove.

12. Using a Phillips screwdriver, remove the captive screws on the LCD assembly connector cover. At the same time, the other hand must hold the phone cover.

Note: Due to the different screw sizes, in order to prevent the position of the screws from being installed when the screws are installed, the components of the mobile phone are damaged. A screw “magnetic memory mat” is recommended to help you remember the position of the screw.

13. Use the tweezers to remove the assembly interface cover, and then use the disassemble crowbar to remove the LCD assembly cable ties. (Remember the strength is not strong)

14. Remove the back cover of the phone. Use a disassemble crowbar to shovel a piece of battery tape attached to the battery.

15. Then pull the battery tape that was shoveled down and pull the battery tape out of the bottom of the battery.

The battery tape can be easily pulled off with proper force.


To avoid damage to your phone, please be aware of the following.

1. Please use the screwdriver correctly, otherwise it will cause the screw to slip. Or damage the phone.

2. Be sure to use a magnetic screw that helps you remember where each screw is located. Improper installation of the screw may damage your phone.

3. In the process of replacing the accessories, the mobile phone cable is relatively fragile, please be careful to disassemble.

4. During the disassembly process, remember to put the removed screws in a safe position to avoid the lack of screws during installation.

Disassemble steps:

1. Remove the teardown tool and phone battery.

2. Turn off your phone.

3. Use a pentagonal screwdriver to remove the two pentagonal screws under the phone (located on both sides of the phone’s charging port).

4. After removing the screws, do not rush to open the back cover of the phone. First use the hair dryer to heat the edge of the phone for 1-2 minutes (so that the waterproof glue softens, easy to open the back cover).

5. Remove the suction cup from the tool and place the suction cup above the “back button”.

6. Gently pull a slit and insert the triangle into the gap.

7. Use a triangular piece to gently open the display. Do not use too much force too fast, otherwise the body may be damaged.

Note: If you are concerned about poor control, you can insert several triangles into the gap to fix it while you are opening the display.

8. After you have opened the display, you can open the display and pull the display off, paying attention to the glue.

9. Use the Phillips screwdriver to remove the set screw on the battery clip iron.

10. Then remove the battery clips with tweezers.

11. Use the disassemble crowbar to remove the battery cable tie. The intensity is not too strong and it is easy to remove.

12. Using a Phillips screwdriver, remove the captive screws on the LCD assembly connector cover. At the same time, the other hand must hold the phone cover.

Note: Due to the different screw sizes, in order to prevent the position of the screws from being installed when the screws are installed, the components of the mobile phone are damaged. A screw “magnetic memory mat” is recommended to help you remember the position of the screw.

13. Use the tweezers to remove the assembly interface cover, and then use the disassemble crowbar to remove the LCD assembly cable opening. (Remember the strength is not strong)

14. Remove the back cover of the phone. Use a disassemble crowbar to shovel a piece of battery tape attached to the battery.

15. Then pull the battery tape that was shoveled down and pull the battery tape out of the bottom of the battery.

The battery tape can be easily pulled off with proper force.

16. Using a hair dryer, properly heat the back cover of the phone for 1-2 minutes, making the battery tape of the attached battery softer and easier to remove.

17. After proper heating, use the disassemble tamper to remove the battery.


Remove the battery tape.

Steps to install the battery

1. Remove a piece of protective film from the battery tape.

2. Attach the battery tape to the battery and remove another piece of protective film.

3. Install the battery

4. Then attach the exposed battery tape to the battery.

5. Remove the old waterproof glue. Then gently peel off it.

6. Remove a piece of protective film from the waterproof adhesive.

7. Attach the waterproof glue to the edge of the back cover and align the tape with the edges. Smooth the waterproof glue.

8. Remove another protective film.

9. Install the display and fasten the LCD assembly cable ties.

10. Fasten the battery cable tie.

11. Close the phone cover, do not put the screws first.

12. Then turn on the phone and check the battery.

13. When the test is complete, turn off the screen display.

14. Install the LCD assembly connector cover.

15. Use a Phillips screwdriver to install the fixing screws on the LCD assembly cable cover.

16. Install the battery clip and screw on it.

17. Close the display. If the display does not fit, it may be that the accessory is not properly installed or something is stuck.

18. Using a pentagonal screwdriver, install the pentagonal screws under the phone.

19. Replacement is complete.

Battery For Lenovo Yoga Tab3 Pro YT3-X90L Lenovo L15D1P31 Tablet PC Batteries

High quality Lenovo L15D1P31 Tablet PC Batteries in UK for Lenovo Yoga Tab3 Pro YT3-X90L.We strive to maintain the highest standards and provide the finest value, quality and service.

Lenovo

Product Details
Brand: Lenovo Tablet PC Batteries
Type: Li-ion
Voltage: 4000mAh/15.2Wh
Capacity: 3.8V
Color: White

Replace battery part number :

L15D1P31

compatible with the following models :

Lenovo Yoga Tab3 Pro YT3-X90L/ L15D1P31


UK-Online.co.uk was established to serve the needs of laptop users, and today we are one of the top e-retailers. Get a great deal on electronics when you shop on www.uk-online.co.uk. Choose an iPad, TV or laptop, headphones, PS4, Xbox One and more. Offers on mobile phones and cameras.

Why are you buying batteries at uk-online.co.uk?

1. Our products are CE certified products, ensuring safe and reliable quality.

2. All products are tested and used repeatedly before leaving the factory to ensure that the products you purchase are fully compatible with your equipment.

3. All products are guaranteed to be new and the price is satisfactory to you.

4. We will update the product regularly. If you have a battery model that you can’t find, please feel free to contact us.

5. All products are backed by a 1-year warranty and a 30-day money-back.

6. Our products are focused on the experience of UK users, please rest assured to buy.

Other Hot Sales:

Lenovo L13L4A61 laptop battery 32WH/4400mAh / 4Cell – 7.2V
LENOVO L14C3K31 tablet battery 9600mAh/36Wh – 3.75V
HP 778951-421 laptop battery 58WH – 15.2V
Doogee BAT17M15580 replacement battery 5580mAh/21.204WH – 3.8V
ASUS C11P1618 replacement battery 3300mAh/12.5WH – 3.85V
CLEVO 6-87-W370S-4271 laptop battery 5200mah/76.96Wh – 14.8V
HP 462969-B21 replacement battery 650MAH – 4.8V
Lenovo BL253 replacement battery 2000mAh/7.6WH – 3.8V/4.35V
Bose 404600 replacement battery 2300mah – 11.1V/12.4v
Bose 063404 replacement battery 2230mAH/17Wh – 7.4V
Bose 061384 replacement battery 2230mAH/17Wh – 7.4V
LG BL-T24 replacement battery 4100Mah/15.8Wh – 3.85V
Alcatel TLp025G2 replacement battery 2580MAH/9.8Wh – 3.8V/4.35V
HP OM03XL laptop battery 57Wh – 11.55V
Lenovo 01AV435 laptop battery 3685mAh/42Wh – 11.4V
BOSE 078592 replacement battery 5500MAH – 14.8V
Lenovo SB10F46456 laptop battery 4200mah/32Wh – 7.6V
Medion A41-D17 laptop battery 3000mAh/45Wh – 15V
Bose 789175 replacement battery 5500MAH/79.2wh – 14.4V
LG BL-S3 replacement battery 410mAh/1.6WH – 3.8V
Bose 63287 replacement battery 2230mAh/17Wh – 7.4V

2 Wheels Hover Scooter Banlance Battery 10S2P18650 VICTPOWER


Cheap Video Game for sale, VICTPOWER 2 Wheels Hover Scooter Banlance battery 10S2P18650.


If you’re an avid gamer, you’ll find a thrilling selection of games, consoles and accessories. Our products include controllers, video rockers, cables, accessories for Nintendo Wii / Sony PS3 / Xbox 360 / Wii / Sony PSP.

VICTPOWER

Product Details
Brand: VICTPOWER
SKU: EVIC2738_Oth

Features

Pcode:VIC2738_Oth


The same type:

VICTa10S2PNB2200CC01 10S2P/22P-ST001 10S2P18650 HY18650-22P10S2P


Compatible models:

Voltage : peak – 42V, working – 36V
Capacity: 4.4Ah
Power: 158W
Cut-off voltage: 26V
Max. discharging current: 30amp
Max Continuous Discharging Amperage: 20 Amps
Rated Discharging Amperage: 15 Amps
Charging Current: <5 Amps
Charging Voltage: 43.2 Volts
Dimension: 135*85*57mm
Net Weight: 970g

Smart Balance Wheel
2 Wheels Hover Scooter Banlance

Battery For Clevo 6-87-W650S-4D4A1 CLEVO W650BAT-6 Laptop Batteries

High quality CLEVO W650BAT-6 Laptop Batteries in UK for Clevo 6-87-W650S-4D4A1.We strive to maintain the highest standards and provide the finest value, quality and service.


Clevo


CLEVO W650BAT-6 Laptop Batteries

Product Details
Brand: CLEVO Laptop Batteries
Type: Li-ion
Voltage: 4400mAH/4.4AH-48.84WH
Capacity: 11.1V
Color: black

Replace battery part number :

W650BAT-6,6-87-W650S-4D4A1

compatible with the following models :

Clevo W650BAT-6 6-87-W650S-4D4A1

UK-Online.co.uk was established to serve the needs of laptop users, and today we are one of the top e-retailers. Get a great deal on electronics when you shop on www.uk-online.co.uk. Choose an iPad, TV or laptop, headphones, PS4, Xbox One and more. Offers on mobile phones and cameras.

Why are you buying batteries at uk-online.co.uk?

1. Our products are CE certified products, ensuring safe and reliable quality.

2. All products are tested and used repeatedly before leaving the factory to ensure that the products you purchase are fully compatible with your equipment.

3. All products are guaranteed to be new and the price is satisfactory to you.

4. We will update the product regularly. If you have a battery model that you can’t find, please feel free to contact us.

5. All products are backed by a 1-year warranty and a 30-day money-back.

6. Our products are focused on the experience of UK users, please rest assured to buy.

Other Hot Sales:

Lenovo L13L4A61 laptop battery 32WH/4400mAh / 4Cell – 7.2V
LENOVO L14C3K31 tablet battery 9600mAh/36Wh – 3.75V
HP 778951-421 laptop battery 58WH – 15.2V
Doogee BAT17M15580 replacement battery 5580mAh/21.204WH – 3.8V
ASUS C11P1618 replacement battery 3300mAh/12.5WH – 3.85V
CLEVO 6-87-W370S-4271 laptop battery 5200mah/76.96Wh – 14.8V
HP 462969-B21 replacement battery 650MAH – 4.8V
Lenovo BL253 replacement battery 2000mAh/7.6WH – 3.8V/4.35V
Bose 404600 replacement battery 2300mah – 11.1V/12.4v
Bose 063404 replacement battery 2230mAH/17Wh – 7.4V
Bose 061384 replacement battery 2230mAH/17Wh – 7.4V
LG BL-T24 replacement battery 4100Mah/15.8Wh – 3.85V
Alcatel TLp025G2 replacement battery 2580MAH/9.8Wh – 3.8V/4.35V
HP OM03XL laptop battery 57Wh – 11.55V
Lenovo 01AV435 laptop battery 3685mAh/42Wh – 11.4V
BOSE 078592 replacement battery 5500MAH – 14.8V
Lenovo SB10F46456 laptop battery 4200mah/32Wh – 7.6V
Medion A41-D17 laptop battery 3000mAh/45Wh – 15V
Bose 789175 replacement battery 5500MAH/79.2wh – 14.4V
LG BL-S3 replacement battery 410mAh/1.6WH – 3.8V
Bose 63287 replacement battery 2230mAh/17Wh – 7.4V


Battery For Bose Soundlink Mini 2 Pack BOSE 088796 Replacement Batteries

High quality BOSE 088796 Replacement Batteries in UK for Bose Soundlink Mini 2 Pack.We strive to maintain the highest standards and provide the finest value, quality and service.

Bose

BOSE 088796 Replacement Batteries

Product Details
Brand: BOSE Replacement Batteries
Type: Li-ion
Voltage: 2230mAH/17Wh
Capacity: 7.4V
Color: Black

Bose

Replace battery part number :

088796 088789 088772

compatible with the following models :


Bose Soundlink Mini 2 Series

Bose

UK-Online.co.uk was established to serve the needs of laptop users, and today we are one of the top e-retailers. Get a great deal on electronics when you shop on www.uk-online.co.uk. Choose an iPad, TV or laptop, headphones, PS4, Xbox One and more. Offers on mobile phones and cameras.

Why are you buying batteries at uk-online.co.uk?

1. Our products are CE certified products, ensuring safe and reliable quality.

2. All products are tested and used repeatedly before leaving the factory to ensure that the products you purchase are fully compatible with your equipment.

3. All products are guaranteed to be new and the price is satisfactory to you.

4. We will update the product regularly. If you have a battery model that you can’t find, please feel free to contact us.

5. All products are backed by a 1-year warranty and a 30-day money-back.

6. Our products are focused on the experience of UK users, please rest assured to buy.

Bose

Bose

Other Hot Sales:

Lenovo L13L4A61 laptop battery 32WH/4400mAh / 4Cell – 7.2V
LENOVO L14C3K31 tablet battery 9600mAh/36Wh – 3.75V
HP 778951-421 laptop battery 58WH – 15.2V
Doogee BAT17M15580 replacement battery 5580mAh/21.204WH – 3.8V
ASUS C11P1618 replacement battery 3300mAh/12.5WH – 3.85V
CLEVO 6-87-W370S-4271 laptop battery 5200mah/76.96Wh – 14.8V
HP 462969-B21 replacement battery 650MAH – 4.8V
Lenovo BL253 replacement battery 2000mAh/7.6WH – 3.8V/4.35V
Bose 404600 replacement battery 2300mah – 11.1V/12.4v
Bose 063404 replacement battery 2230mAH/17Wh – 7.4V
Bose 061384 replacement battery 2230mAH/17Wh – 7.4V
LG BL-T24 replacement battery 4100Mah/15.8Wh – 3.85V
Alcatel TLp025G2 replacement battery 2580MAH/9.8Wh – 3.8V/4.35V
HP OM03XL laptop battery 57Wh – 11.55V
Lenovo 01AV435 laptop battery 3685mAh/42Wh – 11.4V
BOSE 078592 replacement battery 5500MAH – 14.8V
Lenovo SB10F46456 laptop battery 4200mah/32Wh – 7.6V
Medion A41-D17 laptop battery 3000mAh/45Wh – 15V
Bose 789175 replacement battery 5500MAH/79.2wh – 14.4V
LG BL-S3 replacement battery 410mAh/1.6WH – 3.8V
Bose 63287 replacement battery 2230mAh/17Wh – 7.4V

Professional version win10 play game graphics card temperature is too high how to do?

Generally, there are many faults with excessive temperature. For example, the outlet of the heat dissipation module is blocked. If there is no way to dissipate heat, the temperature of the graphics card may be too high. At this time, you can clean the computer to handle the fault.

Another type of fault is that the cooling module is aging or the silicone has been worn out. This situation usually occurs in computers that have been used for a long time. You can choose to replace the heatsink or add thermal silicone to handle the fault.

3.7V Symbol P360 battery for Motorola/Symbol P360, P370, P460 & P470 Scanners 5pcs