To avoid damage to your phone, please be aware of the following.
1. Please use the screwdriver correctly, otherwise it will cause the screw to slip. Or damage the phone.
2. Be sure to use a magnetic screw that helps you remember where each screw is located. Improper installation of the screw may damage your phone.
3. In the process of replacing the accessories, the mobile phone cable is relatively fragile, please be careful to disassemble.
4. During the disassembly process, remember to put the removed screws in a safe position to avoid the lack of screws during installation.
Disassemble steps:
1. Remove the teardown tool and phone battery.
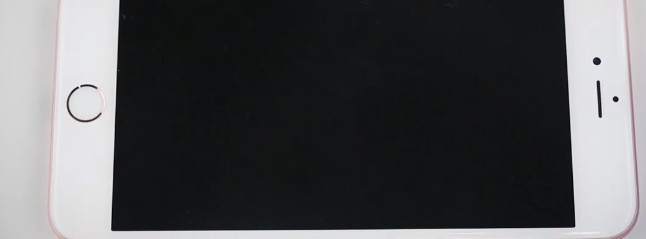
2. Turn off your phone.
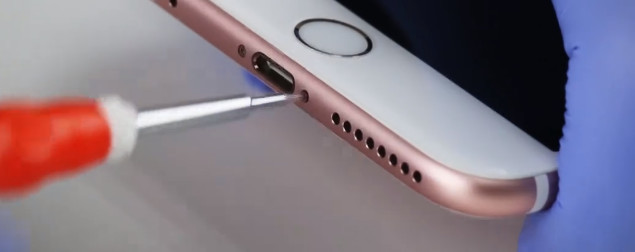
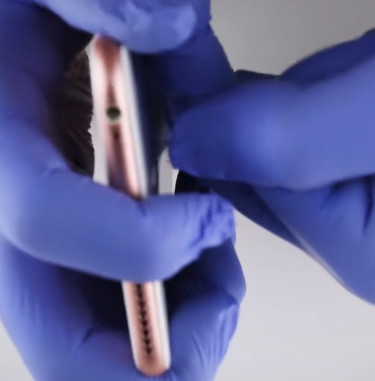
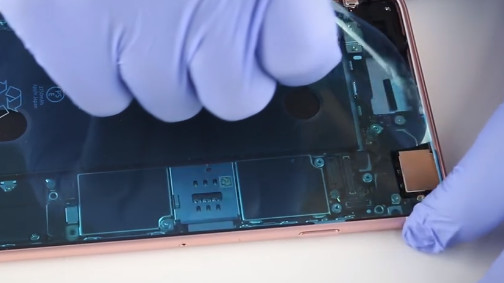
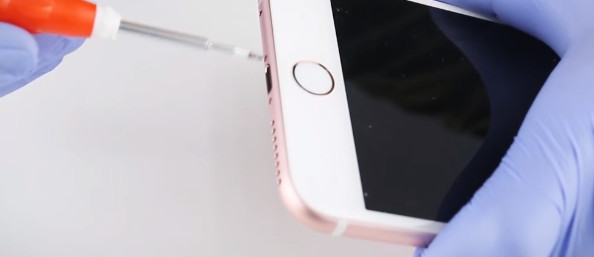
3. Use a pentagonal screwdriver to remove the two pentagonal screws under the phone (located on both sides of the phone’s charging port).
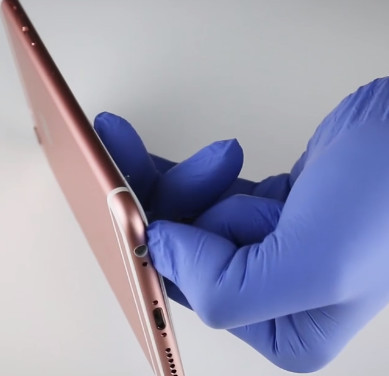
4. After removing the screws, do not rush to open the back cover of the phone. First use the hair dryer to heat the edge of the phone for 1-2 minutes (so that the waterproof glue softens, easy to open the back cover).
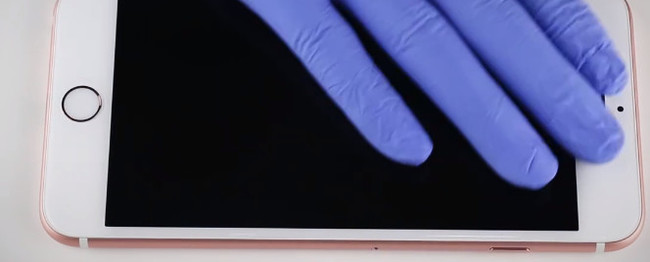
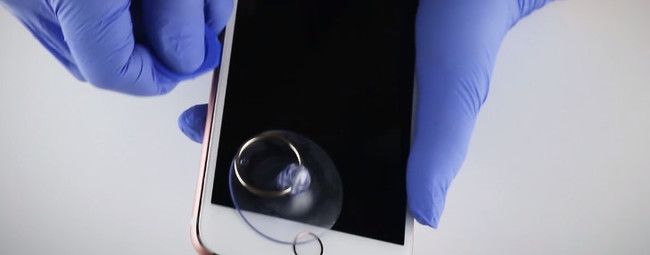
5. Remove the suction cup from the tool and place the suction cup above the “back button”.
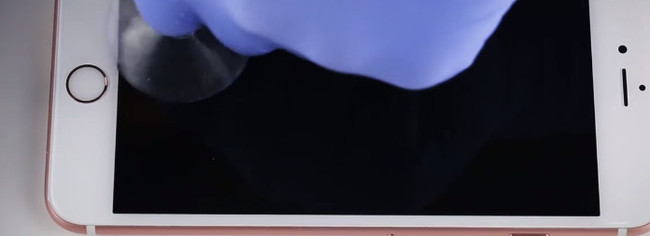
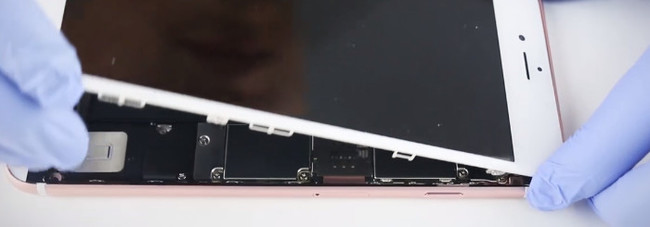
6. Gently pull a slit and insert the triangle into the gap.
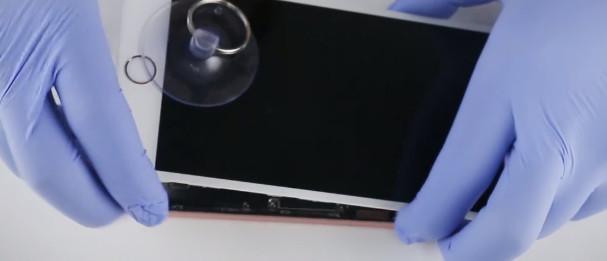
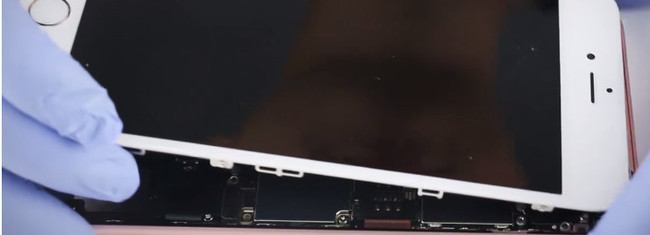
7. Use a triangular piece to gently open the display. Do not use too much force too fast, otherwise the body may be damaged.
Note: If you are concerned about poor control, you can insert several triangles into the gap to fix it while you are opening the display.
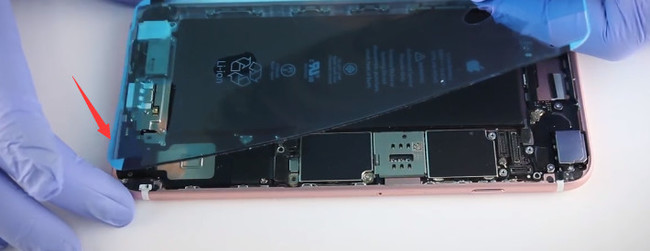
8. After you have opened the display, you can open the display and pull the display off, paying attention to the glue.
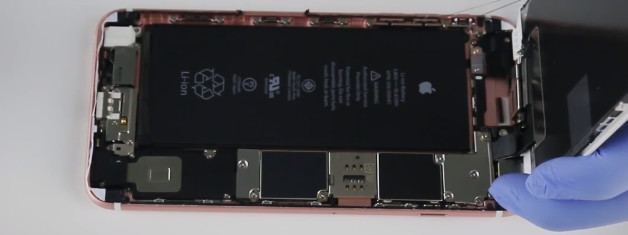
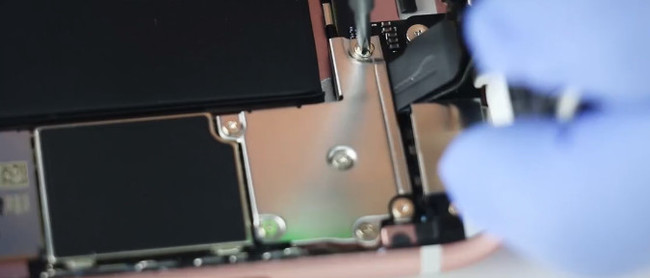
9. Use the Phillips screwdriver to remove the set screw on the battery clip iron.
10. Then remove the battery clips with tweezers.
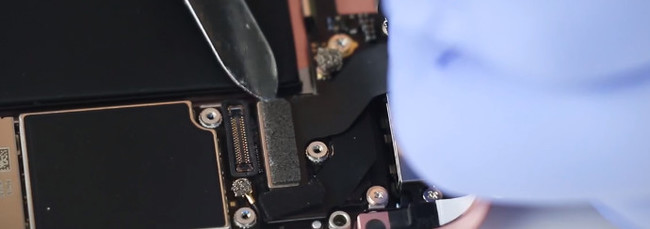
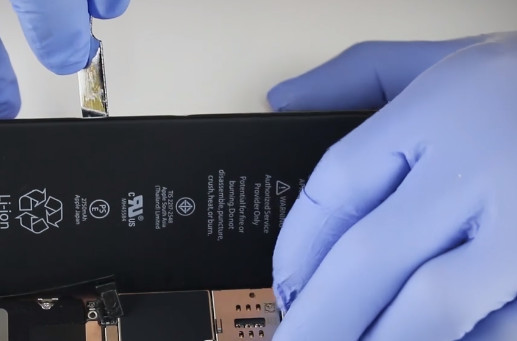
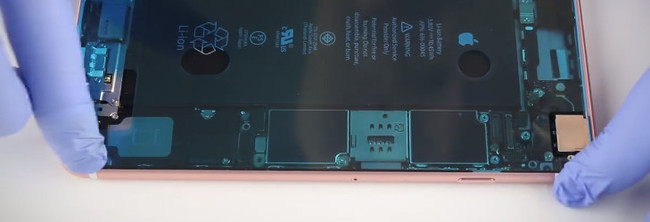
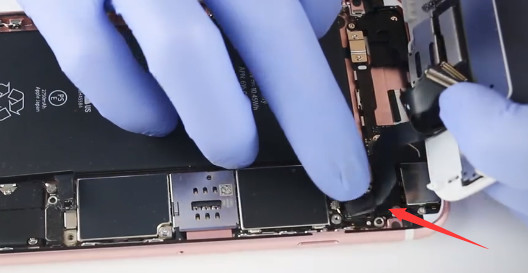
11. Use the disassemble crowbar to remove the battery cable opening. The intensity is not too strong and it is easy to remove.
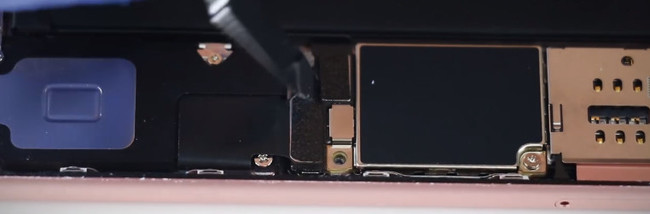
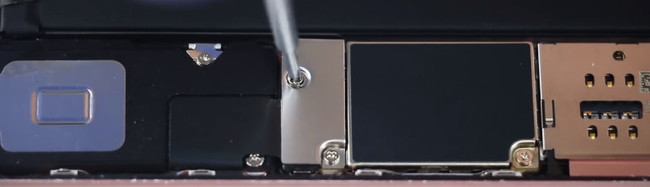
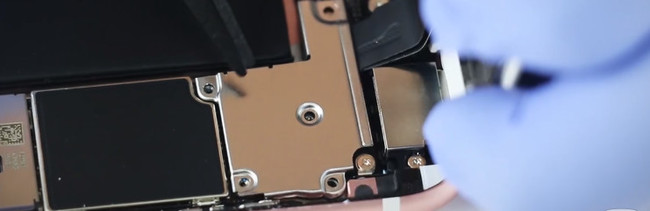
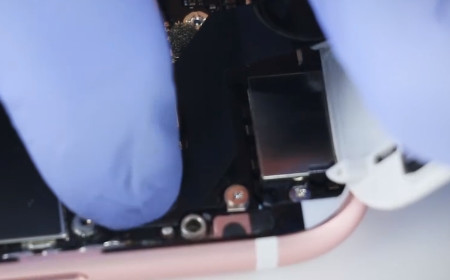
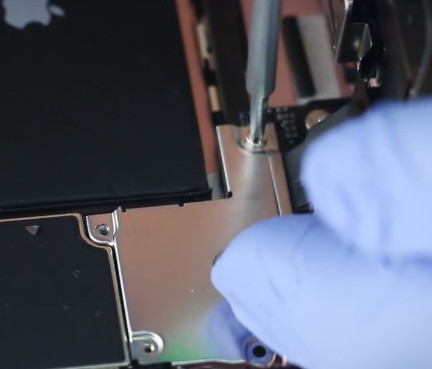
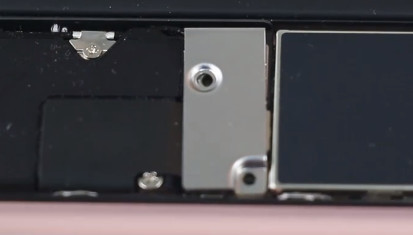
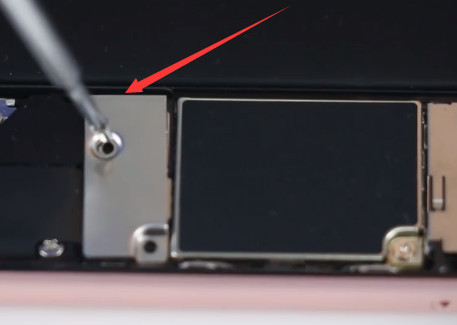
12. Using a Phillips screwdriver, remove the captive screws on the LCD assembly connector cover. At the same time, the other hand must hold the phone cover.
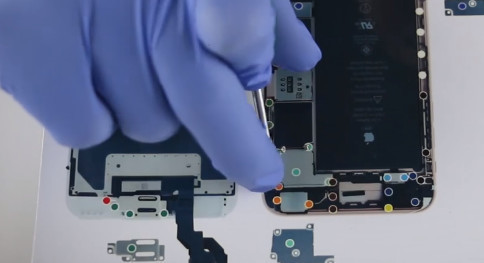
Note: Due to the different screw sizes, in order to prevent the position of the screws from being installed when the screws are installed, the components of the mobile phone are damaged. A screw “magnetic memory mat” is recommended to help you remember the position of the screw.
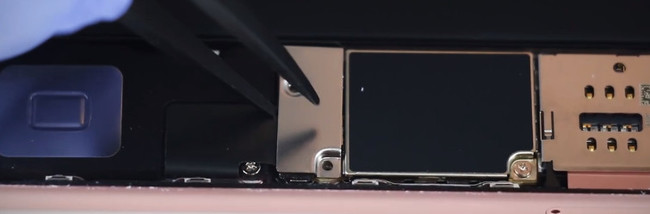
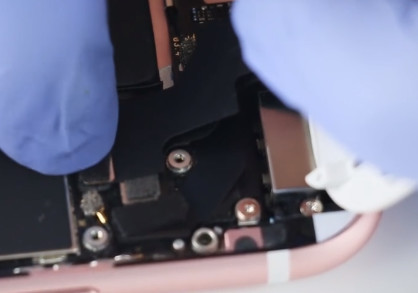
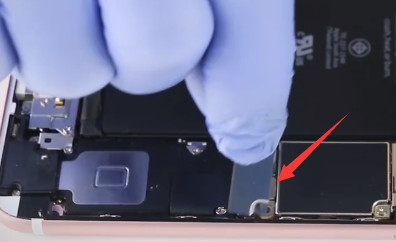
13. Use the tweezers to remove the assembly interface cover, and then use the disassemble crowbar to remove the LCD assembly cable ties. (Remember the strength is not strong)
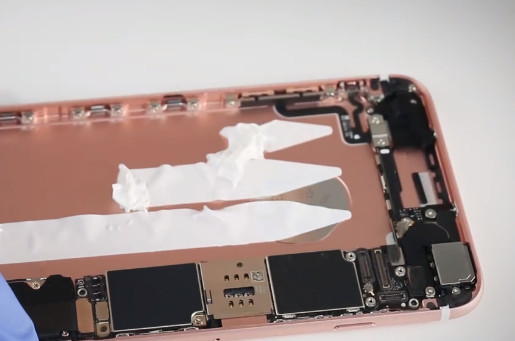
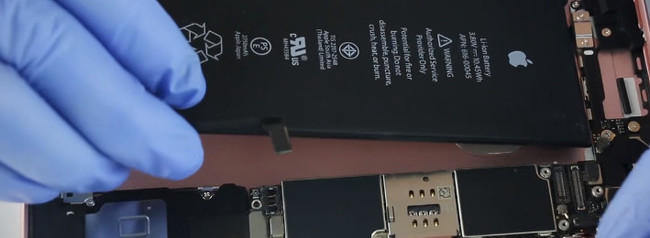
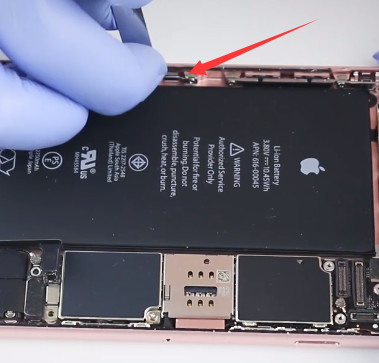
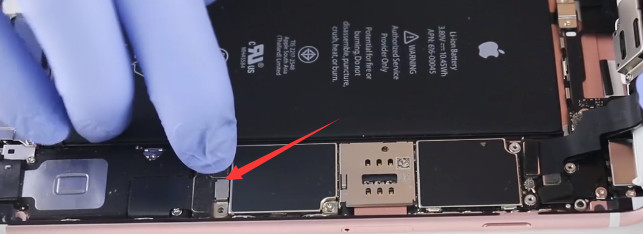
14. Remove the back cover of the phone. Use a disassemble crowbar to shovel a piece of battery tape attached to the battery.
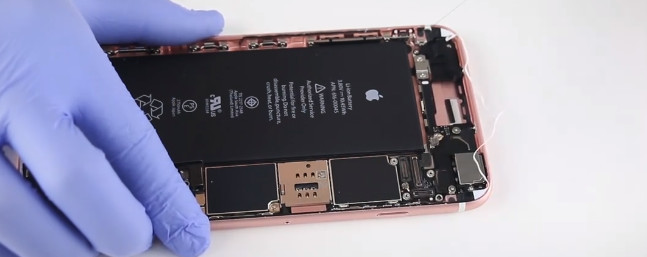
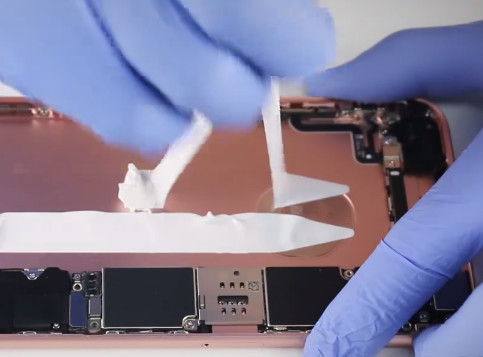
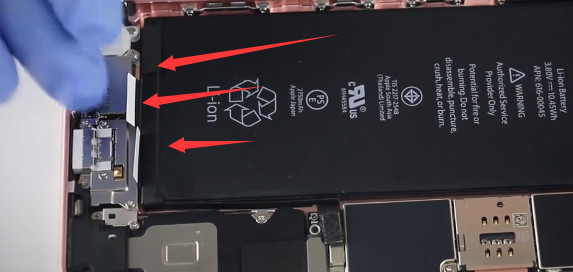
15. Then pull the battery tape that was shoveled down and pull the battery tape out of the bottom of the battery.
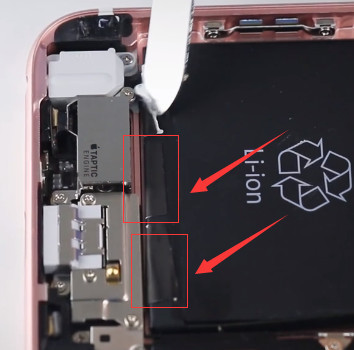
The battery tape can be easily pulled off with proper force.
To avoid damage to your phone, please be aware of the following.
1. Please use the screwdriver correctly, otherwise it will cause the screw to slip. Or damage the phone.
2. Be sure to use a magnetic screw that helps you remember where each screw is located. Improper installation of the screw may damage your phone.
3. In the process of replacing the accessories, the mobile phone cable is relatively fragile, please be careful to disassemble.
4. During the disassembly process, remember to put the removed screws in a safe position to avoid the lack of screws during installation.
Disassemble steps:
1. Remove the teardown tool and phone battery.
2. Turn off your phone.
3. Use a pentagonal screwdriver to remove the two pentagonal screws under the phone (located on both sides of the phone’s charging port).
4. After removing the screws, do not rush to open the back cover of the phone. First use the hair dryer to heat the edge of the phone for 1-2 minutes (so that the waterproof glue softens, easy to open the back cover).
5. Remove the suction cup from the tool and place the suction cup above the “back button”.
6. Gently pull a slit and insert the triangle into the gap.
7. Use a triangular piece to gently open the display. Do not use too much force too fast, otherwise the body may be damaged.
Note: If you are concerned about poor control, you can insert several triangles into the gap to fix it while you are opening the display.
8. After you have opened the display, you can open the display and pull the display off, paying attention to the glue.
9. Use the Phillips screwdriver to remove the set screw on the battery clip iron.
10. Then remove the battery clips with tweezers.
11. Use the disassemble crowbar to remove the battery cable tie. The intensity is not too strong and it is easy to remove.
12. Using a Phillips screwdriver, remove the captive screws on the LCD assembly connector cover. At the same time, the other hand must hold the phone cover.
Note: Due to the different screw sizes, in order to prevent the position of the screws from being installed when the screws are installed, the components of the mobile phone are damaged. A screw “magnetic memory mat” is recommended to help you remember the position of the screw.
13. Use the tweezers to remove the assembly interface cover, and then use the disassemble crowbar to remove the LCD assembly cable opening. (Remember the strength is not strong)
14. Remove the back cover of the phone. Use a disassemble crowbar to shovel a piece of battery tape attached to the battery.
15. Then pull the battery tape that was shoveled down and pull the battery tape out of the bottom of the battery.
The battery tape can be easily pulled off with proper force.
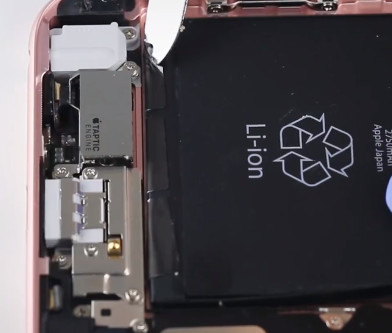
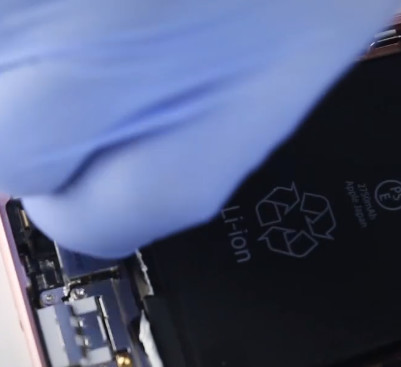
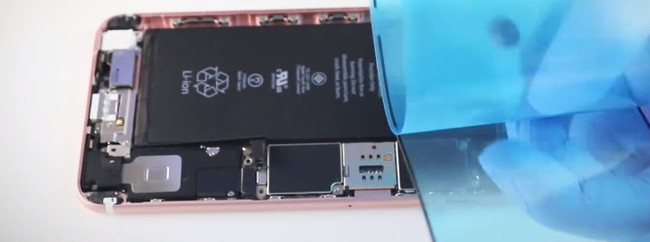
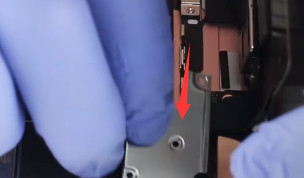
16. Using a hair dryer, properly heat the back cover of the phone for 1-2 minutes, making the battery tape of the attached battery softer and easier to remove.
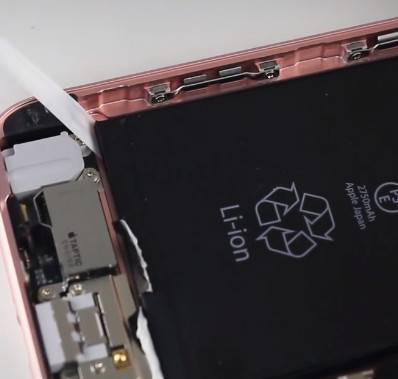
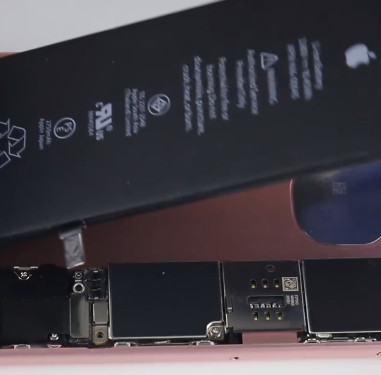
17. After proper heating, use the disassemble tamper to remove the battery.
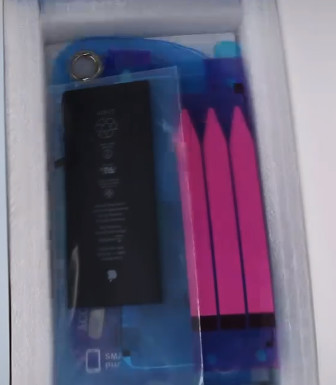
Remove the battery tape.
Steps to install the battery
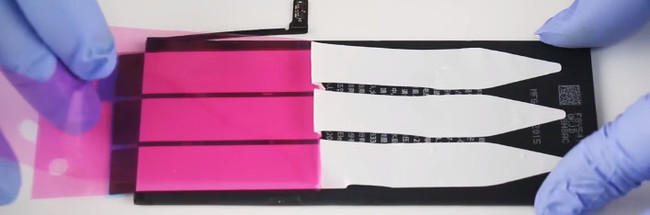
1. Remove a piece of protective film from the battery tape.
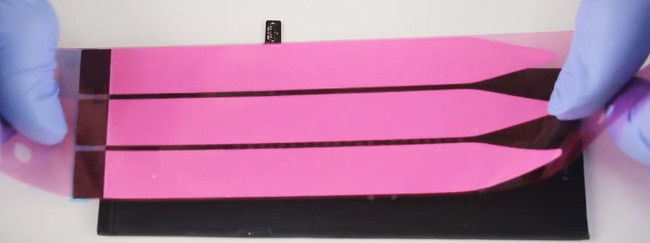
2. Attach the battery tape to the battery and remove another piece of protective film.
3. Install the battery
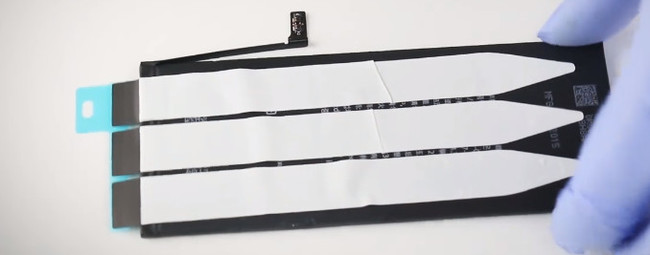
4. Then attach the exposed battery tape to the battery.
5. Remove the old waterproof glue. Then gently peel off it.
6. Remove a piece of protective film from the waterproof adhesive.
7. Attach the waterproof glue to the edge of the back cover and align the tape with the edges. Smooth the waterproof glue.
8. Remove another protective film.
9. Install the display and fasten the LCD assembly cable ties.

10. Fasten the battery cable tie.
11. Close the phone cover, do not put the screws first.
12. Then turn on the phone and check the battery.
13. When the test is complete, turn off the screen display.
14. Install the LCD assembly connector cover.
15. Use a Phillips screwdriver to install the fixing screws on the LCD assembly cable cover.
16. Install the battery clip and screw on it.
17. Close the display. If the display does not fit, it may be that the accessory is not properly installed or something is stuck.
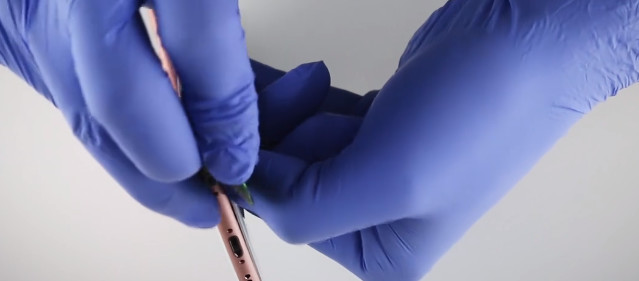
18. Using a pentagonal screwdriver, install the pentagonal screws under the phone.
19. Replacement is complete.