We have all experienced the trouble of computers being attacked by malware. Often when we encounter a malware attack, it is difficult to completely remove them. This article, reprinted from pcworld.com by Eric Geier and Josh Norem, will detail the means to remove malware.
Beware the signs of a PC plagued by malware: slower-than-usual performance, a sudden spate of pop-ups, and other anomalous issues. Yes, out-of-the-ordinary behavior is sometimes the result of hardware conflicts, but your first action should be to rule out the possibility of infection by a virus, spyware, or other nefarious entity—even if you have an antivirus program installed.
Follow this step-by-step guide for instructions on how to get rid of malware.
Step 1: Enter Safe Mode
Before you do anything, you need to disconnect your PC from the internet, and don’t use it until you’re ready to clean your PC. This can help prevent the malware from spreading and/or leaking your private data.
If you think your PC may have a malware infection, boot your PC into Microsoft’s Safe Mode. In this mode, only the minimum required programs and services are loaded. If any malware is set to load automatically when Windows starts, entering in this mode may prevent it from doing so. This is important because it can make removing the nefarious files easier since they’re not actually running or active.
Sadly, Microsoft has turned the process of booting into safe mode from a relatively easy process in Windows 7 and Windows 8 to one that is decidedly more complicated in Windows 10. To boot into Windows Safe Mode, first click the Start button in Windows 10 and select the Power button as if you were going to reboot, but don’t click anything. Next hold down the Shift key and click Reboot. When the full-screen menu appears, select Troubleshooting, then Advanced Options, then Startup Settings. On the next window click the Restart button and wait for the next screen to appear (just stick with us here, we know this is long). Next you will see a menu with numbered startup options; select number 4, which is Safe Mode. Note that if you want to connect to any online scanners you’ll need to select option 5, which is Safe Mode with Networking.
You may find that your PC runs noticeably faster in Safe Mode. This could be a sign that your system has a malware infection, or it could mean that you have a lot of legitimate programs that normally start up alongside Windows. If your PC is outfitted with a solid-state drive it’s probably fast either way.
Step 2: Delete temporary files

Now that you’re in Safe Mode, you’ll want to run a virus scan. But before you do that, delete your temporary files. Doing this may speed up the virus scanning, free up disk space, and even get rid of some malware. To use the Disk Cleanup utility included with Windows 10 just type Disk Cleanup in the search bar or after pressing the Start button and select the tool that appears named Disk Cleanup.
Step 3: Download malware scanners
Now you’re ready to have a malware scanner do its work—and fortunately, running a scanner is enough to remove most standard infections. If you already had an antivirus program active on your computer, you should use a different scanner for this malware check, since your current antivirus software may not have detected the malware. Remember, no antivirus program can detect 100 percent of the millions of malware types and variants.
There are two types of antivirus programs. You’re probably more familiar with real-time antivirus programs, which run in the background and constantly watch for malware. (Another option is an on-demand scanner, which searches for malware infections when you open the program manually and run a scan. You should have only one real-time antivirus program installed at a time, but you can have many on-demand scanners installed to run scans with multiple programs, thereby ensuring that if one program misses something a different one might find it.
If you think your PC is infected, we recommend using an on-demand scanner first and then following up with a full scan by your real-time antivirus program. Among the free (and high-quality) on-demand scanners available are BitDefender Free Edition, Kaspersky Virus Removal Tool, Malwarebytes, Microsoft’s Malicious Software Removal Tool, Avast, and SuperAntiSpyware.
Step 4: Run a scan with Malwarebytes
For illustrative purposes, we’ll describe how to use the Malwarebytes on-demand scanner. To get started, download it. If you disconnected from the internet for safety reasons when you first suspected that you might be infected, reconnect to it so you can download, install, and update Malwarebytes; then disconnect from the internet again before you start the actual scanning. If you can’t access the internet or you can’t download Malwarebytes on the infected computer, download it on another computer, save it to a USB flash drive, and take the flash drive to the infected computer.
After downloading Malwarebytes, run the setup file and follow the wizard to install the program. Once the program opens, it will automatically activate a trial of the paid version that enables real-time scanning. You won’t get charged after the trial ends, however—by default, the program reverts to the standard free version in 14 days. In the meanwhile, you can disable the real-time scanning for those two weeks if you prefer.
To run a scan, switch from the Dashboard tab to the Scan tab. Keep the default scan option (“Threat Scan”) selected and click the Start Scan button. It should check for updates before it runs the scan, but make sure that happens before you proceed.
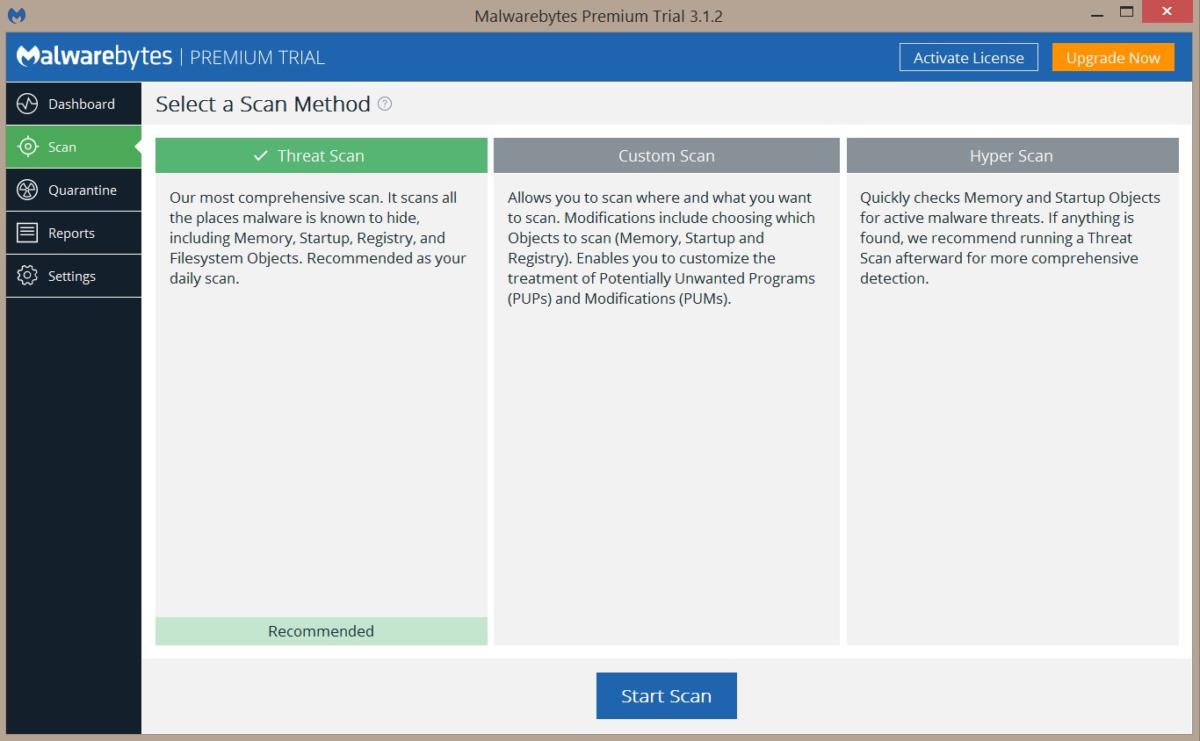
Though it offers a custom-scan option, Malwarebytes recommends that you perform the threat scan first, as that scan usually finds all of the infections anyway. Depending on your computer, the quick scan can take anywhere from 5 to 20 minutes, whereas a custom scan might take 30 to 60 minutes or more. While Malwarebytes is scanning, you can see how many files or objects the software has already scanned, and how many of those files it has identified either as being malware or as being infected by malware.
If Malwarebytes automatically disappears after it begins scanning and won’t reopen, you probably have a rootkit or other deep infection that automatically kills scanners to prevent them from removing it. Though you can try some tricks to get around this malicious technique, you might be better off reinstalling Windows after backing up your files (as discussed later), in view of the time and effort you may have to expend to beat the malware.
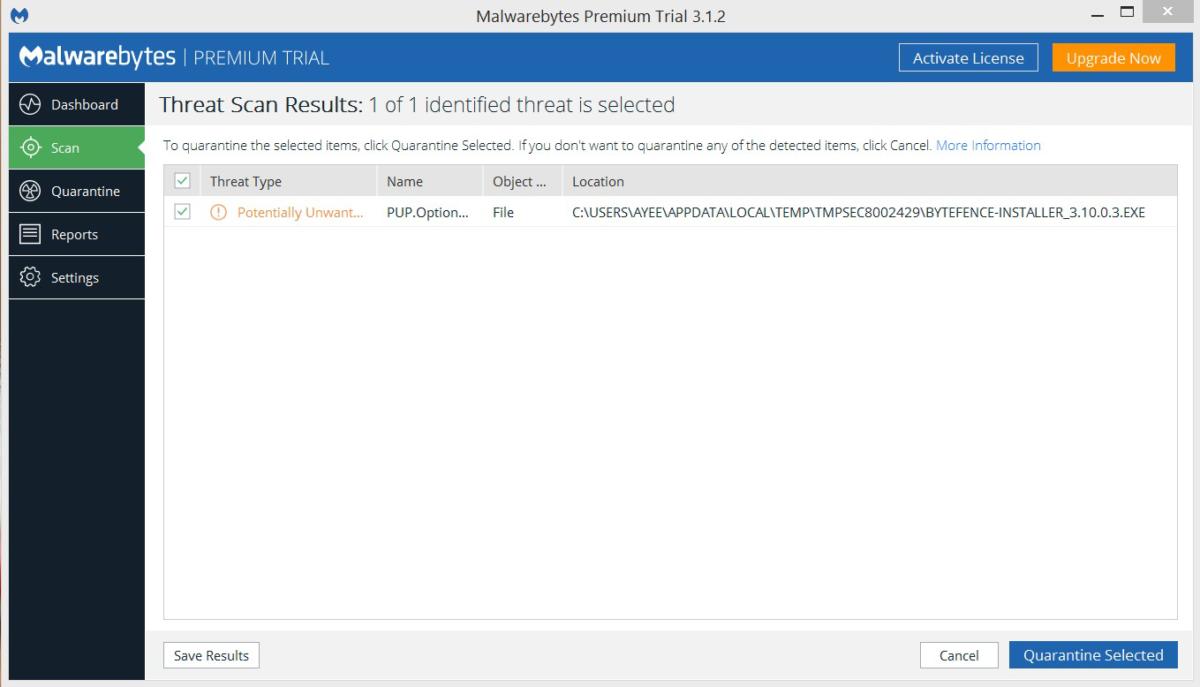
Once the scan is complete, Malwarebytes will show you the results. If the software gives your system a clean bill of health but you still think that your system has acquired some malware, consider running a custom scan with Malwarebytes and trying the other scanners mentioned earlier. If Malwarebytes does find infections, it’ll show you what they are when the scan is complete. Click the Remove Selected button in the lower left to get rid of the specified infections. Malwarebytes may also prompt you to restart your PC in order to complete the removal process, which you should do.
If your problems persist after you’ve run the threat scan and it has found and removed unwanted files, consider running a full scan with Malwarebytes and the other scanners mentioned earlier. If the malware appears to be gone, run a full scan with your real-time antivirus program to confirm that result.
Step 5: Fix your web browser
Malware infections can damage Windows system files and other settings. One common malware trait is to modify your web browser’s homepage to reinfect the PC, display advertisements, prevent browsing, and generally annoy you.
Before launching your web browser, check your homepage and connection settings. Simply go to the setttings window of your browser to check your homepage setting.

Step 6: Recover your files if Windows is corrupt
If you can’t seem to remove the malware or if Windows isn’t working properly, you may have to reinstall Windows. But before wiping your hard drive, copy all of your files to an external USB or flash drive. If you check your email with a client program (such as Outlook or Windows Mail), make sure you export your settings and messages to save them. You should also back up your device drivers with a utility such as Double Driver, in case you don’t have the driver discs anymore or don’t want to download them all again. Remember, you can’t save installed programs. Instead, you’ll have to reinstall the programs from discs or redownload them.
If Windows won’t start or work well enough to permit you to back up your files, you may create and use a Live CD, such as Hiren’s BootCD (HBCD), to access your files.
Once you have backed up everything, reinstall Windows either from the disc that came with your PC, by downloading the installation image from Microsoft, or by using your PC’s factory restore option, if it has one. For a factory restore you typically must press a certain key on the keyboard during the boot process in order for restore procedure to initialize, and your PC should tell you what key to press in the first few seconds after you turn it on. It there’s no on-screen instructions consult your manual, the manufacturer, or Google.
7: Keep your PC clean
Always make sure that you have a real-time antivirus program running on your PC, and make sure this program is always up-to-date. If you don’t want to spend money on yearly subscriptions, you can choose one of the many free programs that provide adequate protection, such as Avira Antivirus Free Edition and Bitdefender Antivirus Free Edition. If you’d prefer a more robust AV program, we recommend Norton Security Premium—see our roundup of the best antivirus software for more information.
In addition to installing traditional antivirus software, you might consider using the free OpenDNS service to help block dangerous sites. And if you frequent shady sites that might infect your PC with malware, consider running your web browser in sandbox mode to prevent any downloaded malware from harming your system. Some antivirus programs, such as Comodo, offer sandboxing features, or you can obtain them through a free third-party program such as Sandboxie.
When you think that you’ve rid your PC of malware infections, double-check your online accounts, including those for your bank, email, and social networking sites. Look for suspicious activity and change your passwords—because some malware can capture your passwords.
If you have a backup system in place that automatically backs up your files or system, consider running virus scans on the backups to confirm that they didn’t inadvertently save infections. If virus scans aren’t feasible, as is the case with online systems since they usually will only scan a drive attached to your PC or just the C:\ drive, consider deleting your old backups and resetting the software to begin saving new backups that are hopefully free from infections.
If you don’t currently have a backup system in place, see our roundups of best backup software for Windows and best online backup services.
Keep Windows, other Microsoft software, and Adobe products up-to-date. Make sure that you have Windows Update turned on and enabled to download and install updates automatically. If you’re not comfortable with this, set Windows to download the updates but let you choose when to install them.
Buy laptop batteries and PC power adapters at www.uk-online.co.uk.