1. First, we find the settings in the main screen, click to enter
2. Then pull the slider and find the battery below to enter
3. Enter the battery, we see the lowest low battery mode, then open the button, you can see the battery mark on the top turns yellow, this is the low battery mode open flag
4. Of course, closing is also very simple, you can close it directly from the button.
5. Low battery mode will stop some special effects of the screen, stop software update, send and receive mail and refresh the background program, so everyone should use it with caution. However, the sending and receiving of WeChat messages is not affected.
6. Below we can see the most used APPs, if you are free, you can increase or decrease as appropriate.
7. Pull to the bottom and see the maximum time that you can stand by in the battery mode. You can decide the time of your phone based on this data after charging.
8. Of course, in low battery mode, the lock screen time will become 30 seconds and cannot be changed.
Month: July 2019
(iphone6) mobile phone touch screen failure solution
1. Cleaning the screen The static electricity on the screen caused by the dryness may cause the touch screen to malfunction. Gently wipe the entire screen with your hand, or remove the protective film to clean the screen.
2. Press the lock screen button Sometimes the touch screen does not respond, not the touch screen fails, but the phone’s memory is insufficient to start to appear stuck, press the lock screen button a few times, maybe it will be restored.
3. Restart the phone There is no mobile phone problem in the world that can’t be solved by restarting the phone. If there is, then restart it again. If the battery is detachable, remember to pry the battery down. If not, wait for the hot phone to return to normal temperature and restart.
4. Uninstalling the newly installed software If the above method is not solved, the cause of the malfunction of the touch screen of the mobile phone may be that the software and the system are not compatible. You can try to uninstall the latest downloaded software.
5. Keep away from the magnetic field If your mobile phone touches the screen, please check if there is any magnetic field around you. Try it from a distance and maybe it will return to normal.
6. Use under normal temperature The temperature environment has a great influence on the touch screen mobile phone. The mobile phone at low temperature can’t even open the machine, and the high temperature may damage the mobile phone. So you know, don’t try to make your phone work in extreme weather.
7. Restoring the factory settings/rooting is similar to the malfunction of the touch screen caused by the poisoning of the mobile phone. The only way is to clean the virus or brush the machine. At this time, it is best to back up the files, and the operation is safe and rapid, so as not to cause unnecessary Loss.
Eight common faults and solutions for Apple iPad
1. iPad can’t charge
The iPad’s theoretical maximum endurance is 10 hours, and the hardware configuration is very high, so the demand for power supply is much higher than similar products. iPad charging requires a high-end USB power input interface. If you connect the data cable to an old computer, you may not be able to activate the charging function.
In addition, when the user first plugs in the iPhone to charge, he must manually change the charging configuration to High Power to meet the needs of the subsequent iPad.
2. Cannot connect to the wifi network.
This is the problem that users have reported the most. It is recommended to press and hold the sleep button, then start and restore the factory settings.
3. Unable to sync calendar or contact
As a portable terminal device, the iPad can transfer/synchronize personal data with a computer. If the above problem occurs, it is recommended to reconfigure the iTurns synchronization history, empty it and import it again.
4. Lose network connection after hibernation
The brightness of the screen can be increased
5. Lack of page number statistics
Because of the complexity of dealing with documents, word count is very important for business people. But the iPad’s built-in office software doesn’t offer similar features. Suggestion: Download Pastebot. It can provide multiple functions such as copy/paste, add images, word count, and more.
6.iWork output file failure
Users who use the iWork component built into the ipad have the feeling that it is very inconvenient to use the components in iWork for “creating” and “exporting”. It is necessary to use the data line and then perform the synchronization operation. For users who are not demanding, it is recommended to use the three components of Pages, Keynote, and Numbers to process basic emails or documents, and then send them out via WIFI.
7. Cannot reproduce the purchase application
Apple is known for its numerous expansion applications, and the new iPad online application market will be gradually improved. Some users report that they can’t perform any effective operations even after they log in to the online app market, even if the app is free. Solution: Use iTurns on your Mac desktop computer to sync to the iPad and purchase.
8. Lack of call function
The positioning of the iPad is a tablet, which itself lacks a call function. But you can install VOIP-Skype. In this way, in a networked environment, the ability to talk to others can be realized. However, video chat is not currently supported.
iPad Air common problems and solutions
Last year, Apple introduced the iPadAir with a new narrow bezel design, a slimmer body and strong performance, so it is still the best 10-inch tablet in the world. However, it is obviously not perfect. Some small problems of hardware and software often cause us trouble, so here we summarize the 10 usage problems and solutions of iPadAir to help you get a better experience.
No sound
If you find that the iPad Air has no sound, first check that the volume setting is correct, then make sure that no device is plugged into the headphone jack, then you can do the following checks:
● Double-click the Home button to close all applications
● Press and hold the power and Home button simultaneously for about 10 seconds to restart in Safe Mode
● Make sure that the lock button is not set to the mute function (you can find related items in Settings – General)
Swipe up from the bottom of the screen to open the Control Center and make sure there is no mute or connected to the Bluetooth output device.
Try inserting the headset and pulling it out, or use a tool to blow into the hole in the earphone.
● Reset the system by setting – General – Restore – Restore all settings
● If the above operations are invalid, you can only contact Apple customer service for testing.
2. The camera does not start or is stationary after startup
Sometimes, you may encounter an iPad Air camera that cannot be started, or often crashes, which is basically a system problem. In addition to closing the application, rebooting, restoring settings, or even restoring the system, you can go to “Settings – General – Access Restrictions” to see if the camera is disabled, or check “Settings – Privacy” to see if the application you are using is disabled. Access to the camera’s permissions.
3. The touch screen is not sensitive or stuck
In fact, the author has also encountered the slow response of the iPad Air touch screen, which is basically a system problem, and you can use iTunes to restore the system. In addition, it may be a film problem or the Voice Over function is turned on.
4. Can’t rotate screen
First, make sure that the lock button is not applied to the screen rotation lock, you can change it in Settings – General, and you can also view it in the Control Center. In addition to this, there are no other solutions besides rebooting, restoring settings, and restoring the system.
5. Crash, no response, frequent restart
There are some small bugs in i0S 7 that may be the culprit causing system operation problems. So, we have to upgrade the iPad Air to the latest version, and turn off all background applications, reboots, restore settings and even the system. If you remember which app is installed, the iPad Air becomes unstable, you can also try to uninstall it. application.
6. iCloud download content is too slow after restoring the system
If you use iCloud to restore backups, a large number of applications, photos and videos need to be downloaded from the network to the iPad Air, so the download speed may not be ideal, then you can restart the router, restart the iPadAir to make the download smoother; It is recommended that you use iTunes local backup to restore faster.
7. Overheated body
In general, running a large game with the iPad Air may result in a hot body. After all, the iPad Air has no built-in fan and the thermal conductivity of the metal back is more obvious. You can achieve better heat dissipation by removing the protective cover, or turn on the air conditioner to lower the room temperature.
8. “Yin and Yang Screen”
The iPad Air screen shows the brightness of the black and white halves. The iPad Air Yin Yang screen is an early production defect, you can distinguish this problem by opening a white picture and background. This is the next time on a hardware and can only be sent to the repair shop for repair.
iPad common fault solution
Today, both the life and the work can see the tablet to the figure, but if you don’t pay attention to it, you will be damaged or malfunction. Today, teach you how to solve common faults.
First, the reason why the tablet can’t open the machine
When the power of the tablet is insufficient, please plug in the power. When using the tablet for the first time, please plug in the power before turning on the phone, charge it for 30 minutes, then turn it on and keep charging. Because the charging state is slower when the power is turned on, turning it on while the battery is exhausted may cause the system to automatically shut down. Press the reset button to press and hold the power button and MENU button to restore the factory.
Second, how to solve the tablet crash?
If a crash occurs during operation, press the reset button to restart. In order to prevent the crash, on the one hand, please pay attention to not too fast when you click the button, it is recommended to operate one by one; on the other hand, if the battery is low, please charge it in time.
Third, what should I do if the touch is not sensitive?
There is a “touch screen calibration” option in the “Settings” menu. After entering, the cross-shaped symbols will appear in the upper left corner, upper right corner, lower left corner, lower right corner and center position. Touch the tablet stylus to calibrate the touch screen. Yes
Fourth, boot white screen, can not enter the system
When the power is insufficient, it is normal for the white screen to be turned on. If you charge more than half an hour after the power is turned off, you can enter the operating system after rebooting.
Five, how to restore the factory
Open Settings -> Privacy and choose to restore factory settings. In the off state, you can also restore the factory settings by pressing the button. Press the power button and MENU button at the same time (two buttons at the same time), the English option interface will appear. There are four options. Press and hold the circle button on the tablet. Select, press the MENU button at the top of the tablet to select upwards, select the third option, then press the HOME button, the factory settings will be automatically restored, the recovery will be completed, then the English option will appear again, select the first item, press the HOME button Automatic restart, recovery is successful.
When the Huawei mobile phone is turned on, the interface is stuck
The phone is always on the Honor interface, it may be that the phone has set permissions, accidentally delete some system files, and then can not enter the system. It is recommended that you try to press and hold the power button for 20 seconds to turn it off and then try it again. Still unable to boot, while pressing the phone power button, volume +, volume – three buttons at the same time, enter the recovery mode, clear the data to restore the factory settings. The data in the phone will be deleted when the factory is restored.
The following steps to enter recovery mode are as follows:
1. Use the volume + and volume buttons to adjust the bright bar to “wipe data/factory reset”, ie “clear data recovery factory setting”, press the power button to confirm.
2. Use the Volume + and Volume – buttons to adjust the highlight to “Yes, delete all user data” and press the power button to confirm.
3. Wait for a while until the screen appears. Select “reboot system now” to restart the phone and press the power button to confirm.
If you still can’t open it, please bring your warranty certificate to the nearby Huawei Customer Service Center for inspection and repair.
Samsung i9100 mobile phone stuck, can only do in the lock screen interface
1. Long press the right power button for 8-10 seconds to boot
2. Restart the phone and press the menu button in the lower left corner to enter the phone security mode, and then check if it can be turned on normally. If you can boot, please delete the recently installed third-party software, or restore the phone to factory settings after backing up important data.
3. If the problem persists, it is recommended that you carry the mobile phone three-pack certificate and send the mobile phone to the nearest Samsung service center for testing.
Tablet password forgot how to crack?
Apple IPAD
1. First of all, you have to put your computer in the boot state, but also open iTunes on the computer, connect the iPad to the computer through the data cable.
2. When you connect your tablet and computer, press your home button and power on the keyboard until the ipad screen appears:
3. You will find that a box will pop up on your computer: click the “OK” button
4. If you find that your tablet is not the latest version of the system, iTunes on your computer will remind you if you want to install iso’s latest system: Click “Restore and Update”.
5. Next, on the page you installed, a box will pop up and click “Next” – “Agree”.
6. And you will see that on the screen of your computer, you will see the latest program download waiting for iso, which takes about 1 hour. The screen saver or black screen cannot appear during the computer screen.
7. Finally, after the version on your tablet is updated to the new version, clicking on the recovery ipad system will automatically install it into your ipad.
8. The final step, after waiting for the new version to be downloaded, will display the screen you need to use when you buy it back. Step by step, finally enter the previous Apple ID and Apple password to complete the recovery, and you can re-use our iPad!
Android tablet
1. Different from Apple’s tablet, it should be shut down on the basis of the power not less than 20%. In the off state, press and hold the volume up + down button + power button, the volume up and down button keeps pressing for 10 seconds. Above, this time will enter the recovery mode, as shown in the figure:
2, find the settings on the flat panel, find “restore factory settings” in the settings, and then use the power button to determine, it will automatically double-clear and restore the factory. Figure:
3, after everything is done, reopen your tablet is the time to buy it back, you can enter the tablet.
iPhone battery disassembly process (iPhone6s Plus as an example)
To avoid damage to your phone, please be aware of the following.
1. Please use the screwdriver correctly, otherwise it will cause the screw to slip. Or damage the phone.
2. Be sure to use a magnetic screw that helps you remember where each screw is located. Improper installation of the screw may damage your phone.
3. In the process of replacing the accessories, the mobile phone cable is relatively fragile, please be careful to disassemble.
4. During the disassembly process, remember to put the removed screws in a safe position to avoid the lack of screws during installation.
Disassemble steps:
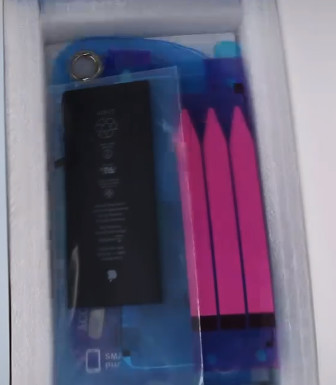
1. Remove the teardown tool and phone battery.
2. Turn off your phone.
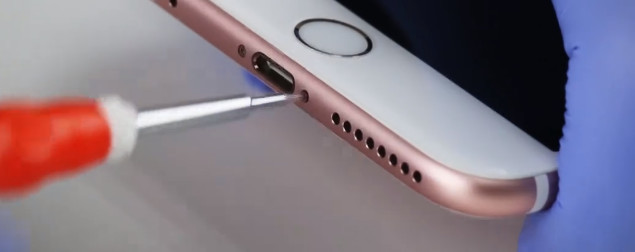
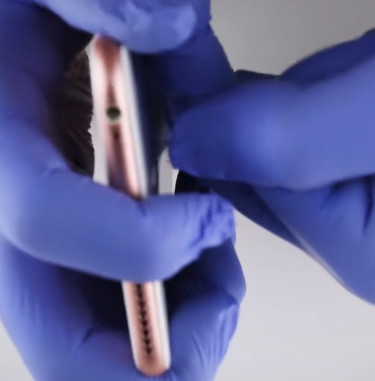
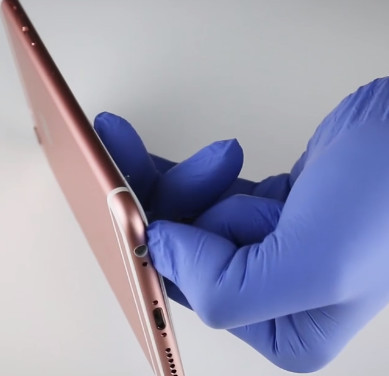
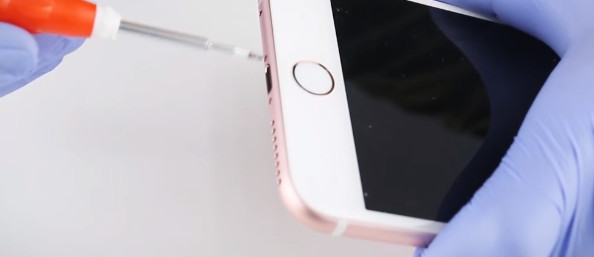
3. Use a pentagonal screwdriver to remove the two pentagonal screws under the phone (located on both sides of the phone’s charging port).
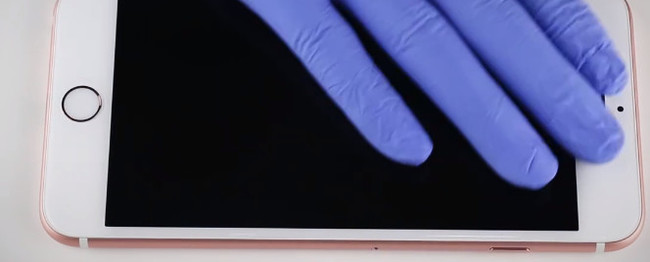
4. After removing the screws, do not rush to open the back cover of the phone. First use the hair dryer to heat the edge of the phone for 1-2 minutes (so that the waterproof glue softens, easy to open the back cover).
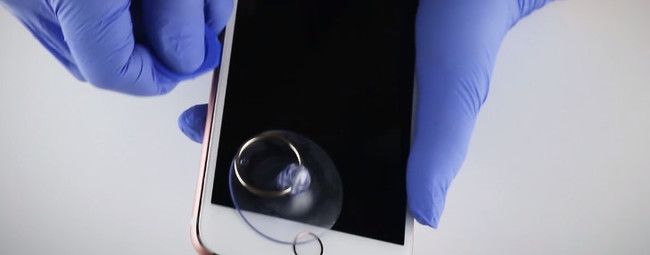
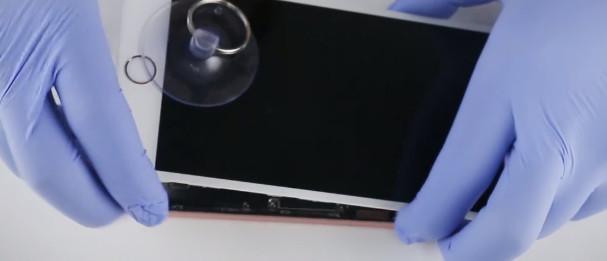
5. Remove the suction cup from the tool and place the suction cup above the “back button”.
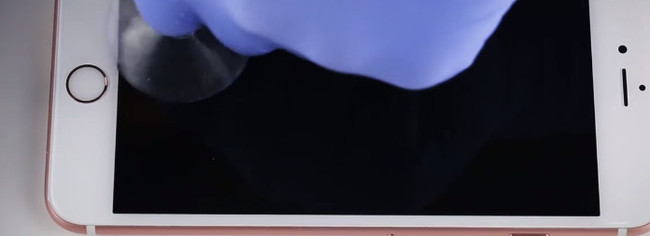
6. Gently pull a slit and insert the triangle into the gap.
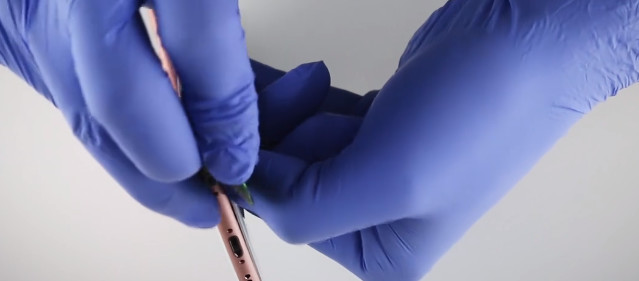
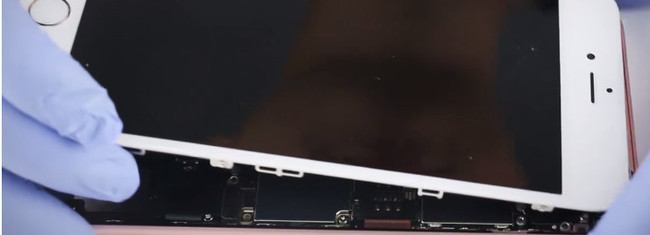
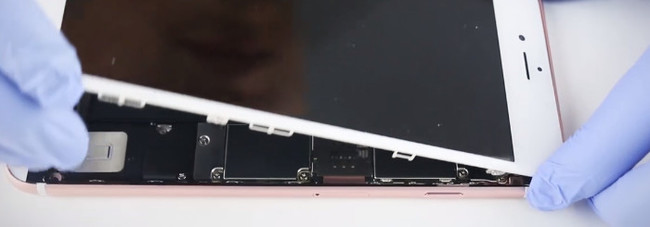
7. Use a triangular piece to gently open the display. Do not use too much force too fast, otherwise the body may be damaged.
Note: If you are concerned about poor control, you can insert several triangles into the gap to fix it while you are opening the display.
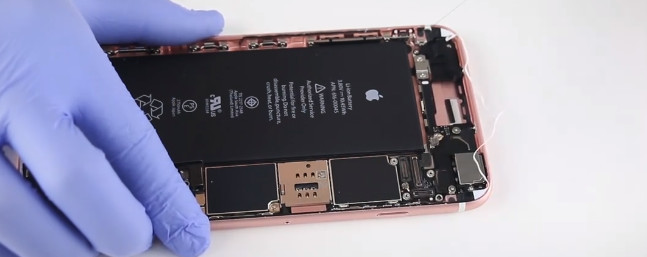
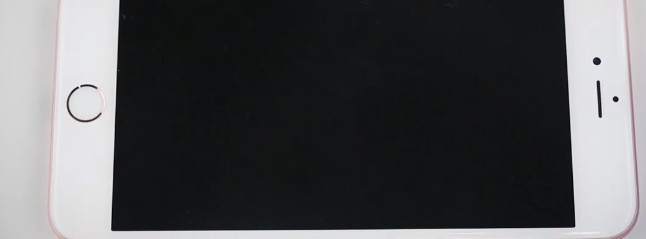
8. After you have opened the display, you can open the display and pull the display off, paying attention to the glue.
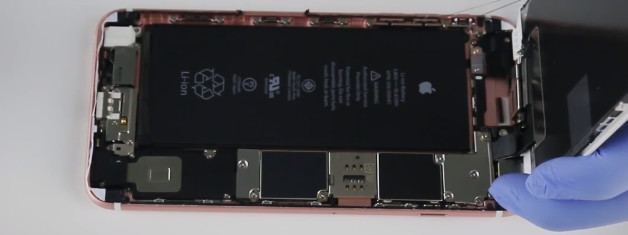
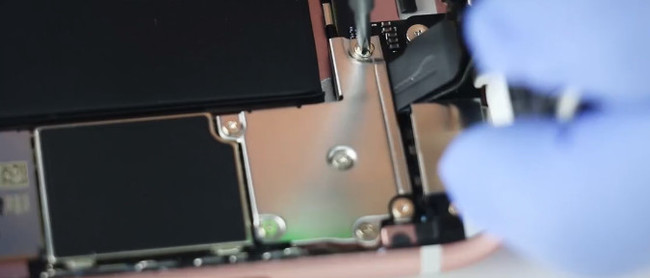
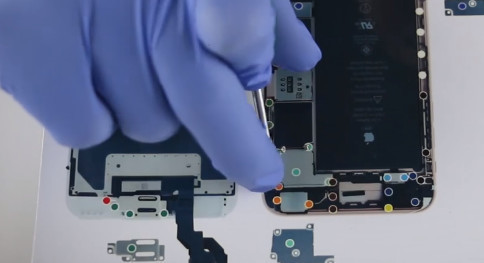
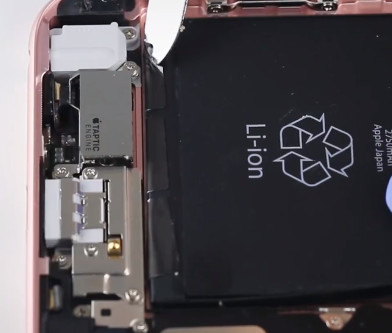
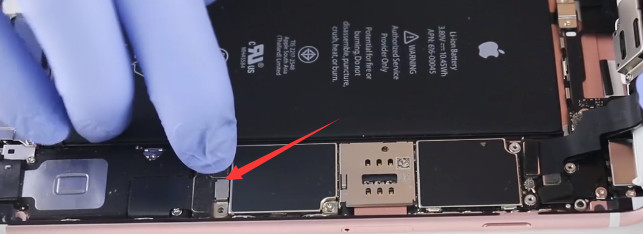
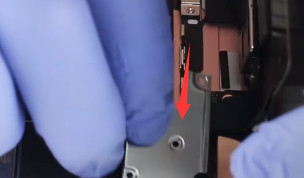
9. Use the Phillips screwdriver to remove the set screw on the battery clip iron.
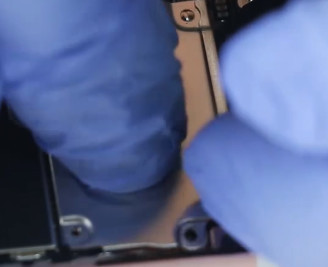
10. Then remove the battery clips with tweezers.
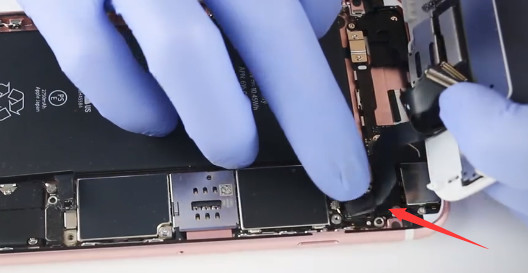
11. Use the disassemble crowbar to remove the battery cable opening. The intensity is not too strong and it is easy to remove.
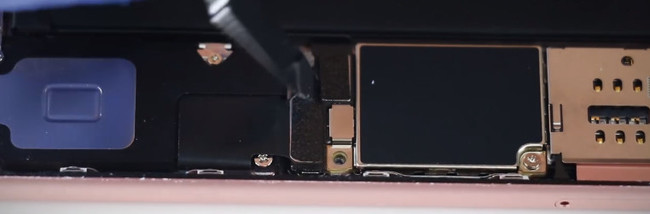
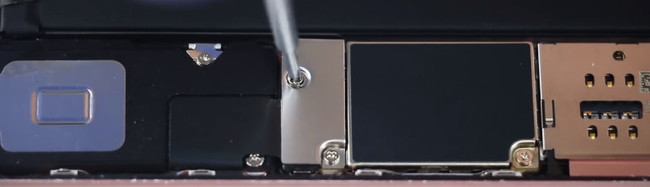
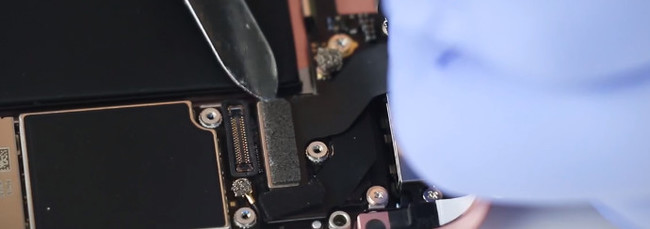
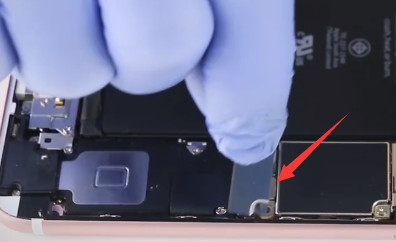
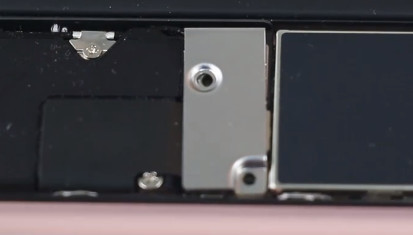
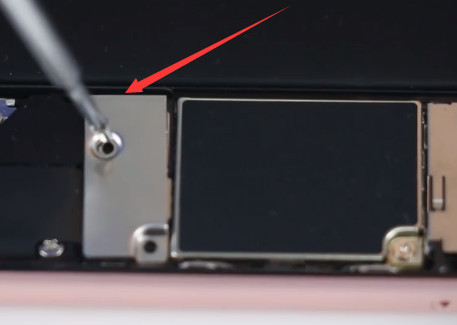
12. Using a Phillips screwdriver, remove the captive screws on the LCD assembly connector cover. At the same time, the other hand must hold the phone cover.
Note: Due to the different screw sizes, in order to prevent the position of the screws from being installed when the screws are installed, the components of the mobile phone are damaged. A screw “magnetic memory mat” is recommended to help you remember the position of the screw.
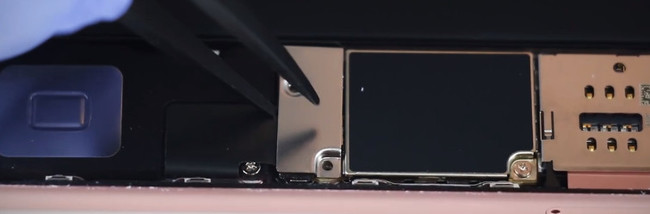
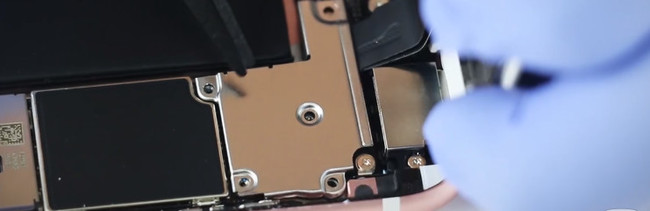
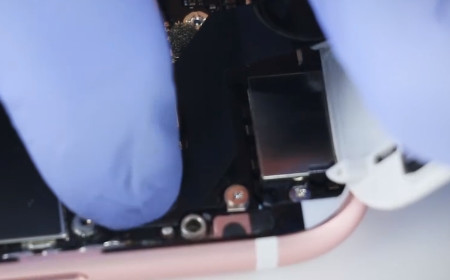
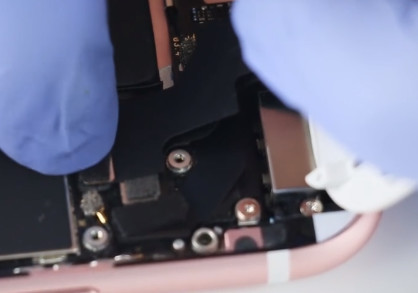
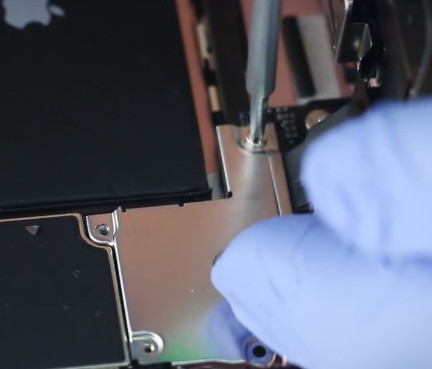
13. Use the tweezers to remove the assembly interface cover, and then use the disassemble crowbar to remove the LCD assembly cable ties. (Remember the strength is not strong)
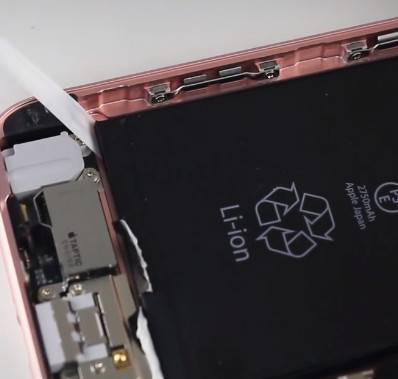
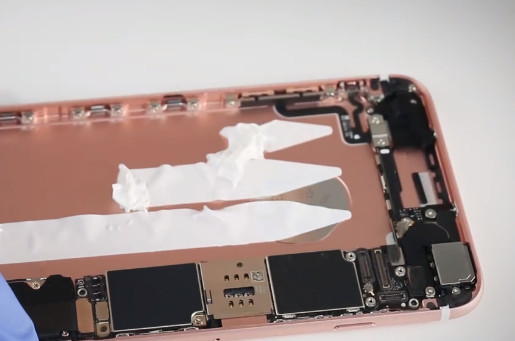
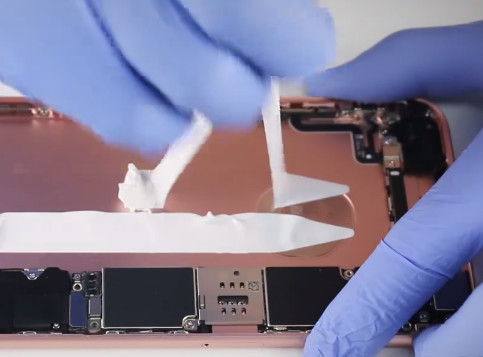
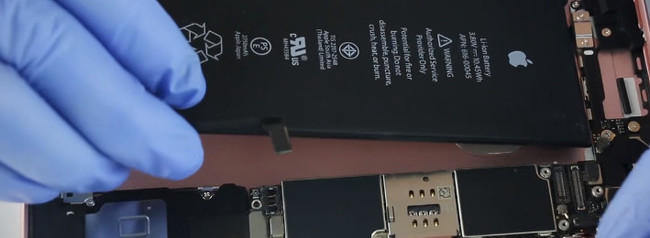
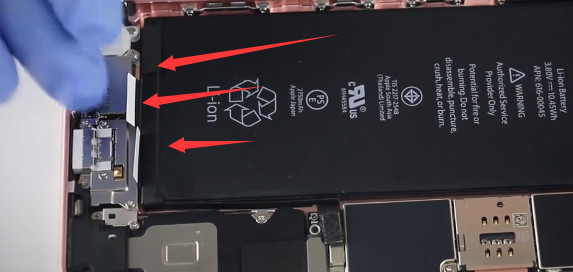
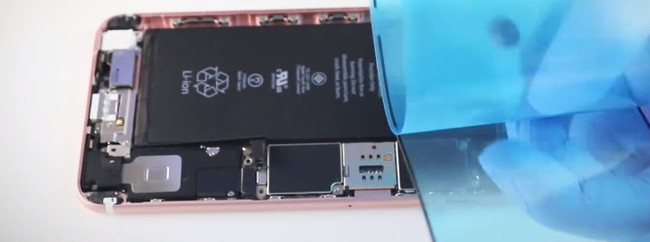
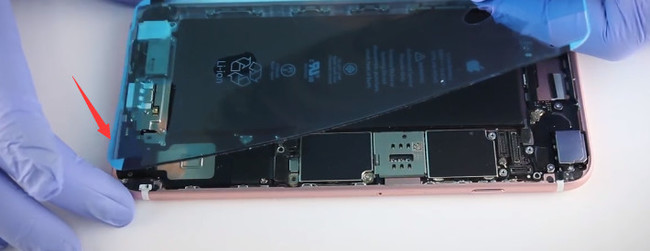
14. Remove the back cover of the phone. Use a disassemble crowbar to shovel a piece of battery tape attached to the battery.
15. Then pull the battery tape that was shoveled down and pull the battery tape out of the bottom of the battery.
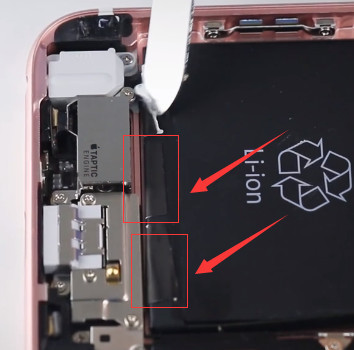
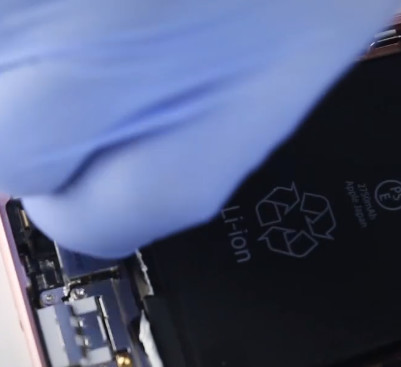
The battery tape can be easily pulled off with proper force.
To avoid damage to your phone, please be aware of the following.
1. Please use the screwdriver correctly, otherwise it will cause the screw to slip. Or damage the phone.
2. Be sure to use a magnetic screw that helps you remember where each screw is located. Improper installation of the screw may damage your phone.
3. In the process of replacing the accessories, the mobile phone cable is relatively fragile, please be careful to disassemble.
4. During the disassembly process, remember to put the removed screws in a safe position to avoid the lack of screws during installation.
Disassemble steps:
1. Remove the teardown tool and phone battery.
2. Turn off your phone.
3. Use a pentagonal screwdriver to remove the two pentagonal screws under the phone (located on both sides of the phone’s charging port).
4. After removing the screws, do not rush to open the back cover of the phone. First use the hair dryer to heat the edge of the phone for 1-2 minutes (so that the waterproof glue softens, easy to open the back cover).
5. Remove the suction cup from the tool and place the suction cup above the “back button”.
6. Gently pull a slit and insert the triangle into the gap.
7. Use a triangular piece to gently open the display. Do not use too much force too fast, otherwise the body may be damaged.
Note: If you are concerned about poor control, you can insert several triangles into the gap to fix it while you are opening the display.
8. After you have opened the display, you can open the display and pull the display off, paying attention to the glue.
9. Use the Phillips screwdriver to remove the set screw on the battery clip iron.
10. Then remove the battery clips with tweezers.
11. Use the disassemble crowbar to remove the battery cable tie. The intensity is not too strong and it is easy to remove.
12. Using a Phillips screwdriver, remove the captive screws on the LCD assembly connector cover. At the same time, the other hand must hold the phone cover.
Note: Due to the different screw sizes, in order to prevent the position of the screws from being installed when the screws are installed, the components of the mobile phone are damaged. A screw “magnetic memory mat” is recommended to help you remember the position of the screw.
13. Use the tweezers to remove the assembly interface cover, and then use the disassemble crowbar to remove the LCD assembly cable opening. (Remember the strength is not strong)
14. Remove the back cover of the phone. Use a disassemble crowbar to shovel a piece of battery tape attached to the battery.
15. Then pull the battery tape that was shoveled down and pull the battery tape out of the bottom of the battery.
The battery tape can be easily pulled off with proper force.
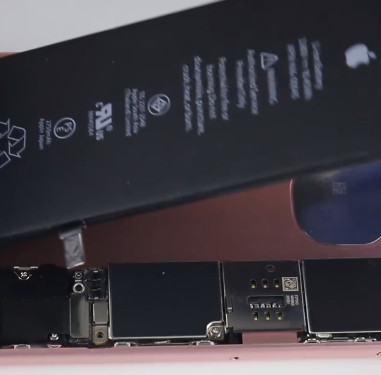
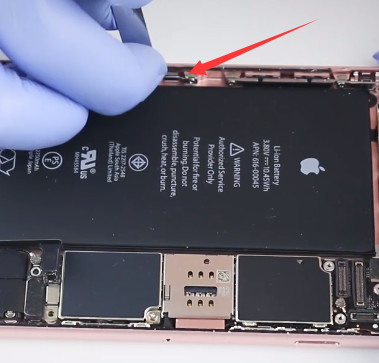
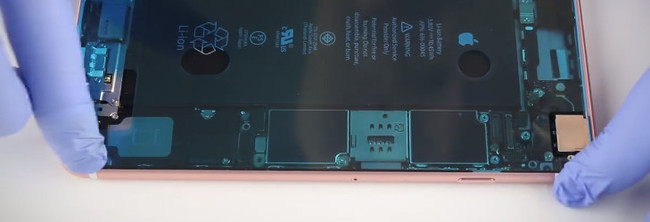
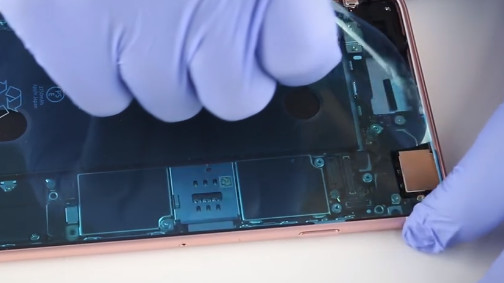
16. Using a hair dryer, properly heat the back cover of the phone for 1-2 minutes, making the battery tape of the attached battery softer and easier to remove.
17. After proper heating, use the disassemble tamper to remove the battery.
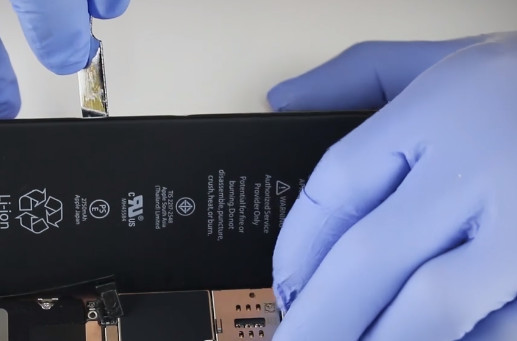
Remove the battery tape.
Steps to install the battery
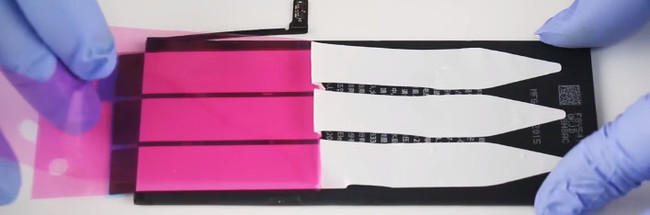
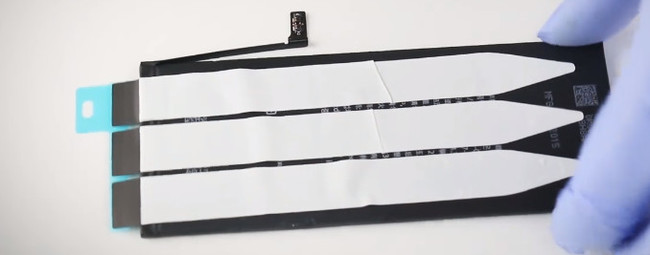
1. Remove a piece of protective film from the battery tape.
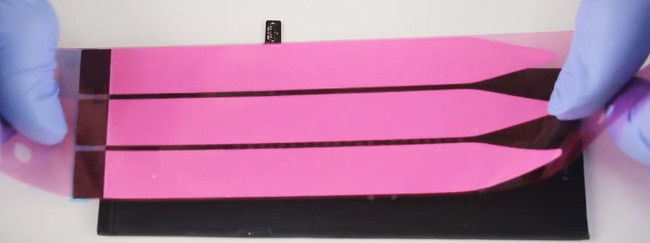
2. Attach the battery tape to the battery and remove another piece of protective film.
3. Install the battery
4. Then attach the exposed battery tape to the battery.
5. Remove the old waterproof glue. Then gently peel off it.
6. Remove a piece of protective film from the waterproof adhesive.
7. Attach the waterproof glue to the edge of the back cover and align the tape with the edges. Smooth the waterproof glue.
8. Remove another protective film.
9. Install the display and fasten the LCD assembly cable ties.

10. Fasten the battery cable tie.
11. Close the phone cover, do not put the screws first.
12. Then turn on the phone and check the battery.
13. When the test is complete, turn off the screen display.
14. Install the LCD assembly connector cover.
15. Use a Phillips screwdriver to install the fixing screws on the LCD assembly cable cover.
16. Install the battery clip and screw on it.
17. Close the display. If the display does not fit, it may be that the accessory is not properly installed or something is stuck.
18. Using a pentagonal screwdriver, install the pentagonal screws under the phone.
19. Replacement is complete.
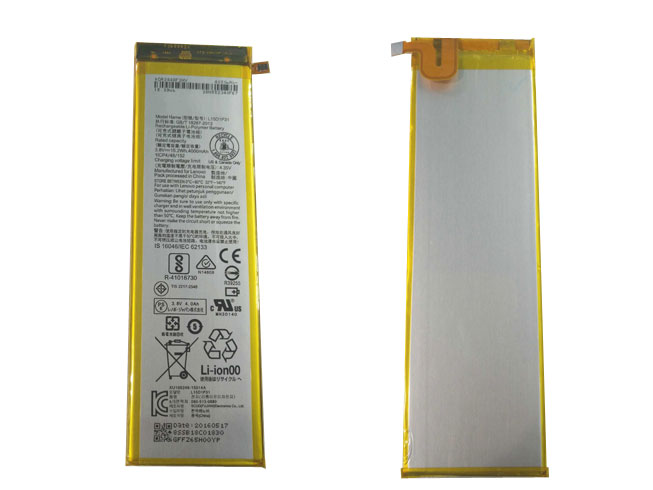
Battery For Lenovo Yoga Tab3 Pro YT3-X90L Lenovo L15D1P31 Tablet PC Batteries
High quality Lenovo L15D1P31 Tablet PC Batteries in UK for Lenovo Yoga Tab3 Pro YT3-X90L.We strive to maintain the highest standards and provide the finest value, quality and service.
| Product Details | |
|---|---|
| Brand: | Lenovo Tablet PC Batteries |
| Type: | Li-ion |
| Voltage: | 4000mAh/15.2Wh |
| Capacity: | 3.8V |
| Color: | White |
Replace battery part number :
L15D1P31
compatible with the following models :
Lenovo Yoga Tab3 Pro YT3-X90L/ L15D1P31
UK-Online.co.uk was established to serve the needs of laptop users, and today we are one of the top e-retailers. Get a great deal on electronics when you shop on www.uk-online.co.uk. Choose an iPad, TV or laptop, headphones, PS4, Xbox One and more. Offers on mobile phones and cameras.
Why are you buying batteries at uk-online.co.uk?
1. Our products are CE certified products, ensuring safe and reliable quality.
2. All products are tested and used repeatedly before leaving the factory to ensure that the products you purchase are fully compatible with your equipment.
3. All products are guaranteed to be new and the price is satisfactory to you.
4. We will update the product regularly. If you have a battery model that you can’t find, please feel free to contact us.
5. All products are backed by a 1-year warranty and a 30-day money-back.
6. Our products are focused on the experience of UK users, please rest assured to buy.
Other Hot Sales:
Lenovo L13L4A61 laptop battery 32WH/4400mAh / 4Cell – 7.2V
LENOVO L14C3K31 tablet battery 9600mAh/36Wh – 3.75V
HP 778951-421 laptop battery 58WH – 15.2V
Doogee BAT17M15580 replacement battery 5580mAh/21.204WH – 3.8V
ASUS C11P1618 replacement battery 3300mAh/12.5WH – 3.85V
CLEVO 6-87-W370S-4271 laptop battery 5200mah/76.96Wh – 14.8V
HP 462969-B21 replacement battery 650MAH – 4.8V
Lenovo BL253 replacement battery 2000mAh/7.6WH – 3.8V/4.35V
Bose 404600 replacement battery 2300mah – 11.1V/12.4v
Bose 063404 replacement battery 2230mAH/17Wh – 7.4V
Bose 061384 replacement battery 2230mAH/17Wh – 7.4V
LG BL-T24 replacement battery 4100Mah/15.8Wh – 3.85V
Alcatel TLp025G2 replacement battery 2580MAH/9.8Wh – 3.8V/4.35V
HP OM03XL laptop battery 57Wh – 11.55V
Lenovo 01AV435 laptop battery 3685mAh/42Wh – 11.4V
BOSE 078592 replacement battery 5500MAH – 14.8V
Lenovo SB10F46456 laptop battery 4200mah/32Wh – 7.6V
Medion A41-D17 laptop battery 3000mAh/45Wh – 15V
Bose 789175 replacement battery 5500MAH/79.2wh – 14.4V
LG BL-S3 replacement battery 410mAh/1.6WH – 3.8V
Bose 63287 replacement battery 2230mAh/17Wh – 7.4V